

When you’ll need this
- The AI knows the answer but handles it in the wrong order — it skips follow-up questions it should ask or tools it should check — and you want to fix this type of task into a set process.
- You want to standardize how a category of questions is handled (for example, “product recommendation” or “after-sales objection handling”) so the AI follows the same order every time.
- You need to limit where a skill applies or which tools it uses: customer conversations only, supervisor conversations only, or a specific set of callable tools.
- You want to stop using a skill for now: turn it off in the list and watch the effect instead of deleting it.
How to get there
Left menu → Skills Library. Skills Library is a standalone entry in the left menu, not under the “Knowledge Base” group. The page title is “Skills Library” and the description reads “Manage the skills AI uses to answer customer questions.” Skills Library is not saved per Selected window: switching the “Selected window” on the left does not switch the skill list here.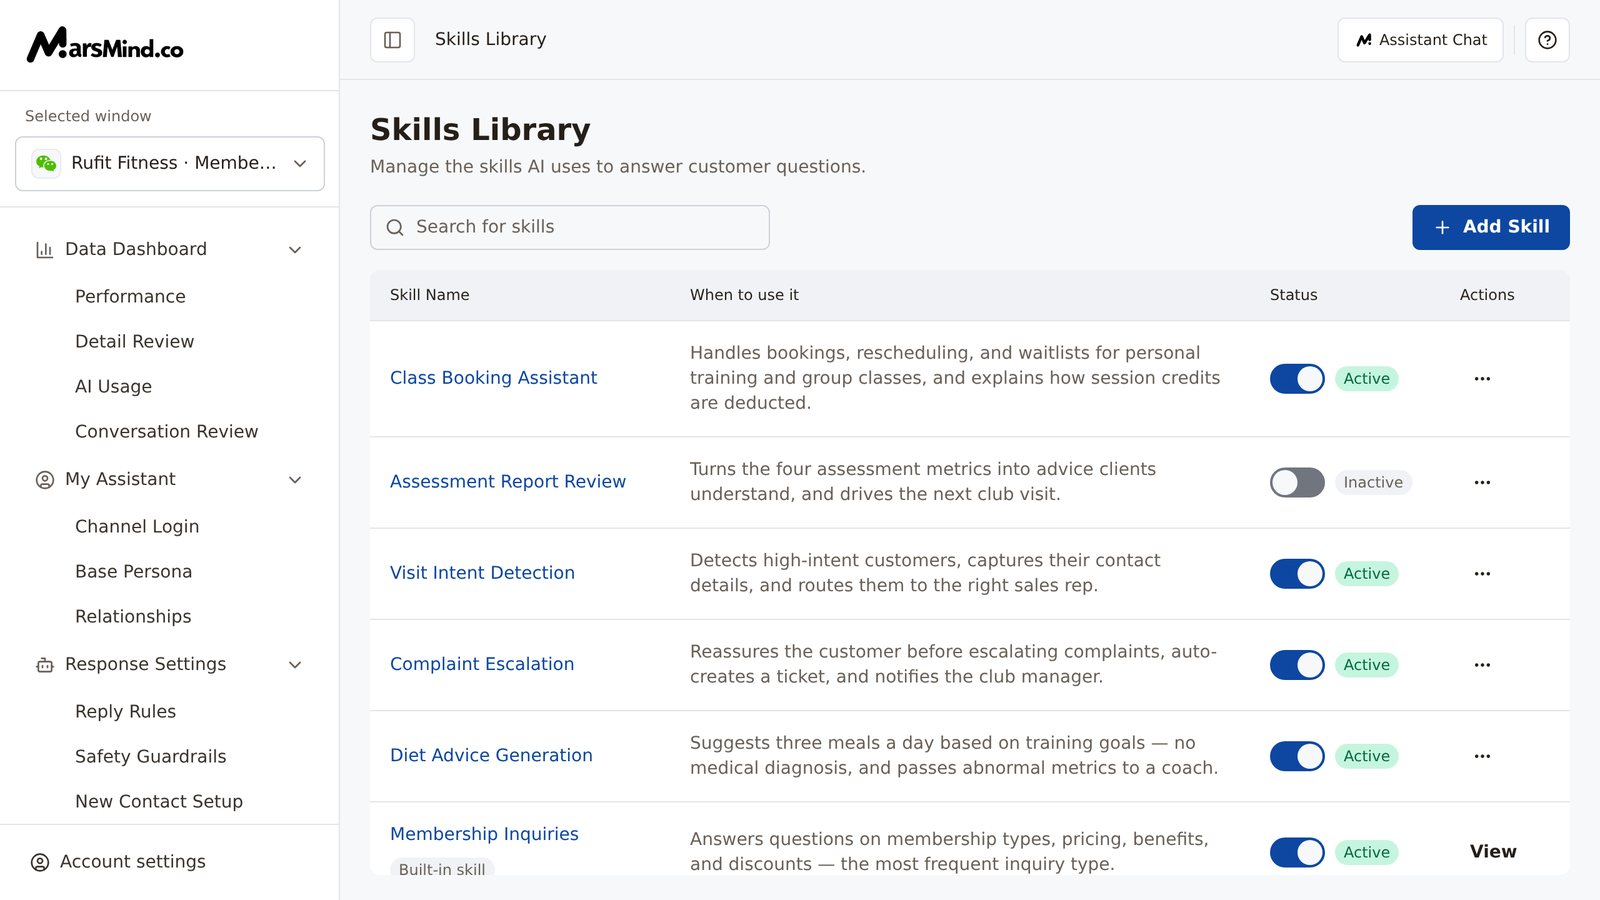
Steps
1
Find the skill in the list and check whether it is “Active” or “Inactive”
Type a keyword in “Search for skills”; the list filters as you type by skill name and by the content of “When to use it” — no need to click a search button. Custom skills come first, built-in skills after.The “Status” column is a toggle with a pill: on reads “Active”, off reads “Inactive”. Clicking the toggle submits immediately with no confirmation; if the change fails, “Status change failed. Please try again.” appears and the toggle returns to its previous state.
- Built-in skills carry a “Built-in skill” badge, and their “Actions” column only has “View”.
- Custom skills show a ”⋯” menu under “Actions” with “View”, “Edit”, and “Delete”.
2
Click “Add Skill” and fill in “Skill name” and “When to use it”
Click “Add Skill” at the top right to open the editor; when editing an existing skill, the title reads “Edit skill · skill name”.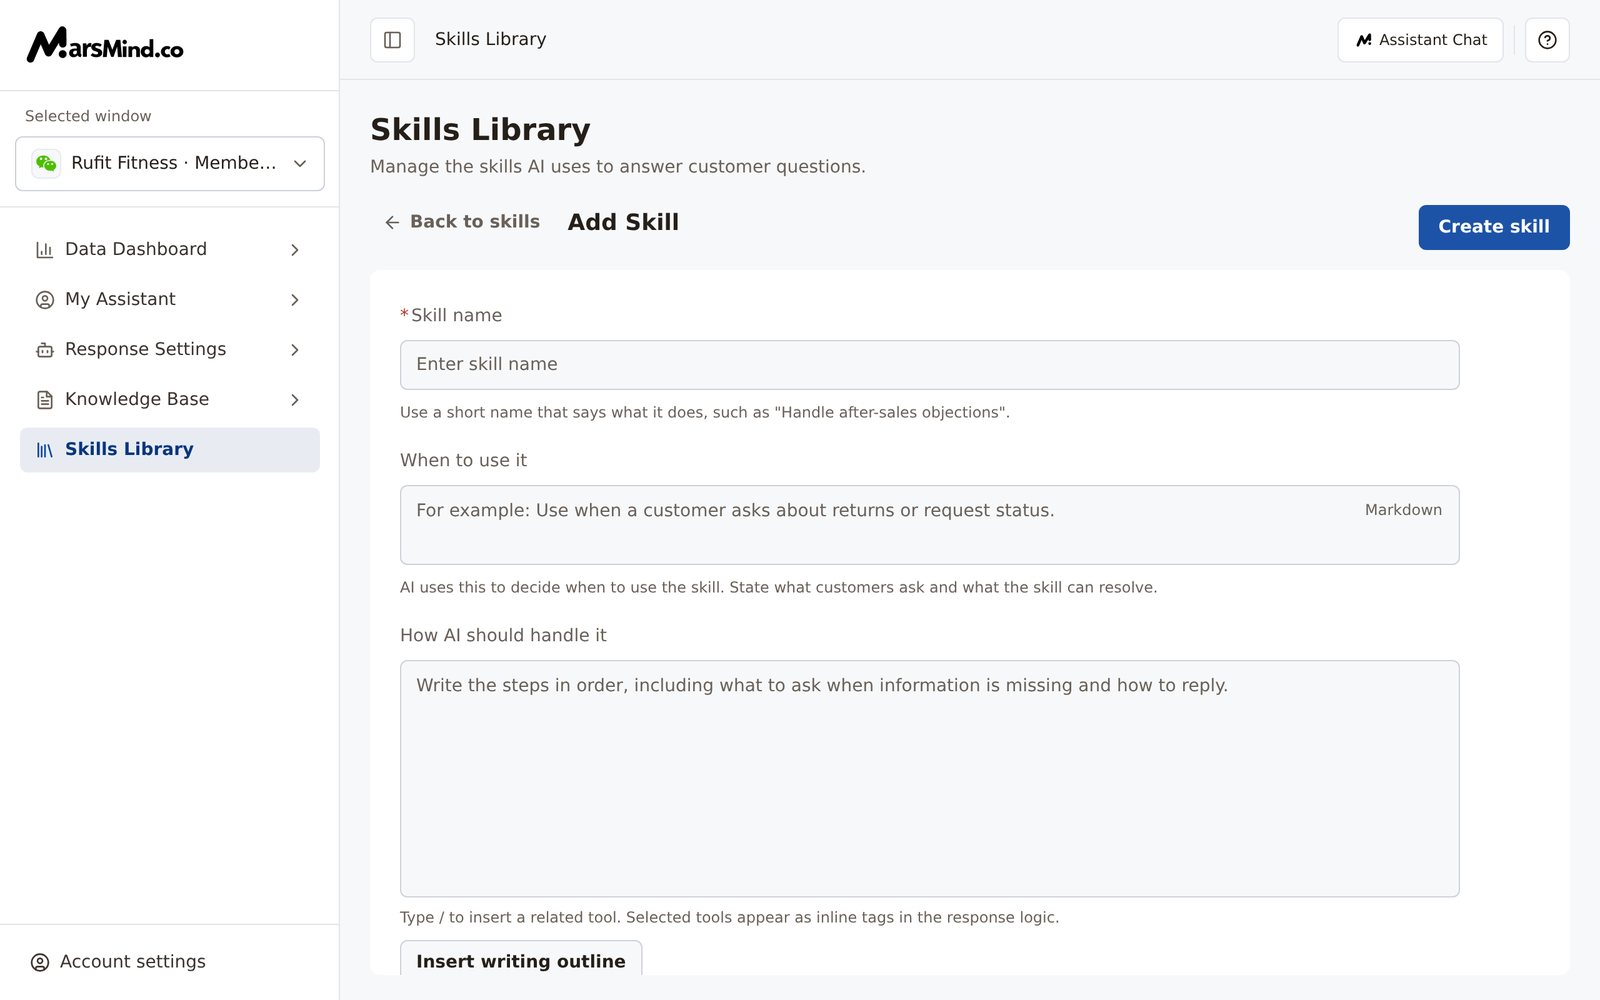
- Skill name: required. Use a short name that says what it does, for example “Handle after-sales objections”. If you leave it empty and click create, “Skill name is required” appears.
- When to use it: state what customers ask and what the skill can resolve. The AI uses this to decide when to use the skill.
3
Write “How AI should handle it”
Write the steps in order: what to check first, how to follow up when information is missing, what to look up when a lookup is needed, how to reply at the end, and what to do if the lookup fails. Once the skill is triggered, the AI follows these steps; you can also note the tools it should call and what to do when they fail.
- When the editor is empty, click “Insert writing outline” below to fill in a five-step template (First check → If information is missing → When a lookup is needed → When replying to the customer → If the lookup fails). Editing the template is faster than starting from a blank page.
- Type / to open the list of related tools; the tool you select is inserted into the process as a tag.
4
Choose “Which conversations” and “Tools to use”
“Which conversations” has three options:
- Supervisor conversations: the AI can call this skill when confirming issues with a supervisor, reporting progress, or asking for human help.
- Customer conversations: the AI can call this skill when replying to customers, following up on their issues, or handling their requests.
- Both: the AI can call this skill in both supervisor-facing and customer-facing exchanges.
- Match tools automatically: the system matches tools to the skill based on its content after creation.
- Choose tools manually: check tools by category; expand a category to check tools one by one, or check the category to select every tool in it. If you save with nothing selected, the skill has no linked tools.
5
Save and verify
Click “Create skill” at the top right (or “Save changes” when editing). “Saved successfully” appears and the page returns to the list.How to tell it worked: the skill appears in the list with the status “Active” — new skills are enabled by default; if you do not want to use it yet, go back to the list and turn the toggle off.Note: if “Skill content was saved, but later settings were not completed. Retry here.” appears, the skill content is already saved — only enablement or tool binding did not finish. Stay on the page (the button now reads “Save changes”) and click it again to retry; this does not create a duplicate.
6
View, edit, and delete
Click a skill name or “View” to open the detail page: content is split into “When to use it” and “How AI should handle it”, with “Built-in skill / Custom skill” and “Active / Inactive” badges at the top and “Back to skills” at the top left.
- Edit: for a custom skill, click “Edit” at the top right of the detail page, or choose “Edit” from the ”⋯” menu in the list; click “Save changes” when done.
- Built-in skills: their content cannot be edited. The detail page notes “Built-in skill content cannot be edited. You can turn it on or off in the list.” and offers no edit or delete entry.
- Delete: for a custom skill, choose “Delete” from the ”⋯” menu; the “Are you sure you want to delete this skill?” dialog shows the skill name, and confirming deletes it immediately.
Checkpoints
- The target skill’s status reads “Active”, and the toggle matches the pill.
- After creating or editing a skill, “Saved successfully” appeared, and the list and detail page match what you entered.
- “When to use it” describes the trigger scenario, and “Which conversations” covers the scenarios where you actually use the skill.
Important notes
Skills and knowledge do different jobs: the Knowledge Base (Knowledge Generation, Knowledge Optimization, Knowledge Management) covers what the AI knows; the Skills Library covers how it acts — for the same question, knowledge supplies the answer while the skill decides the processing steps and tool calls.
Skills with a “Built-in skill” badge in the list are provided by the system: content is read-only, and you can enable or disable them. Skills without the badge are custom skills, which you can edit and delete.