

When to use it
- You just logged in for the first time and want to understand the layout and where to start configuring.
- You know what you want to change but are not sure which module it is under.
- You are onboarding a new colleague or taking over an account and need a quick pass through the interface structure.
- A page shows Connect a window or empty content, and you want to check whether you selected the right window.
Where to find it
After you log in, you land on Business Performance (left menu → Data Dashboard → Performance). Here is the full page: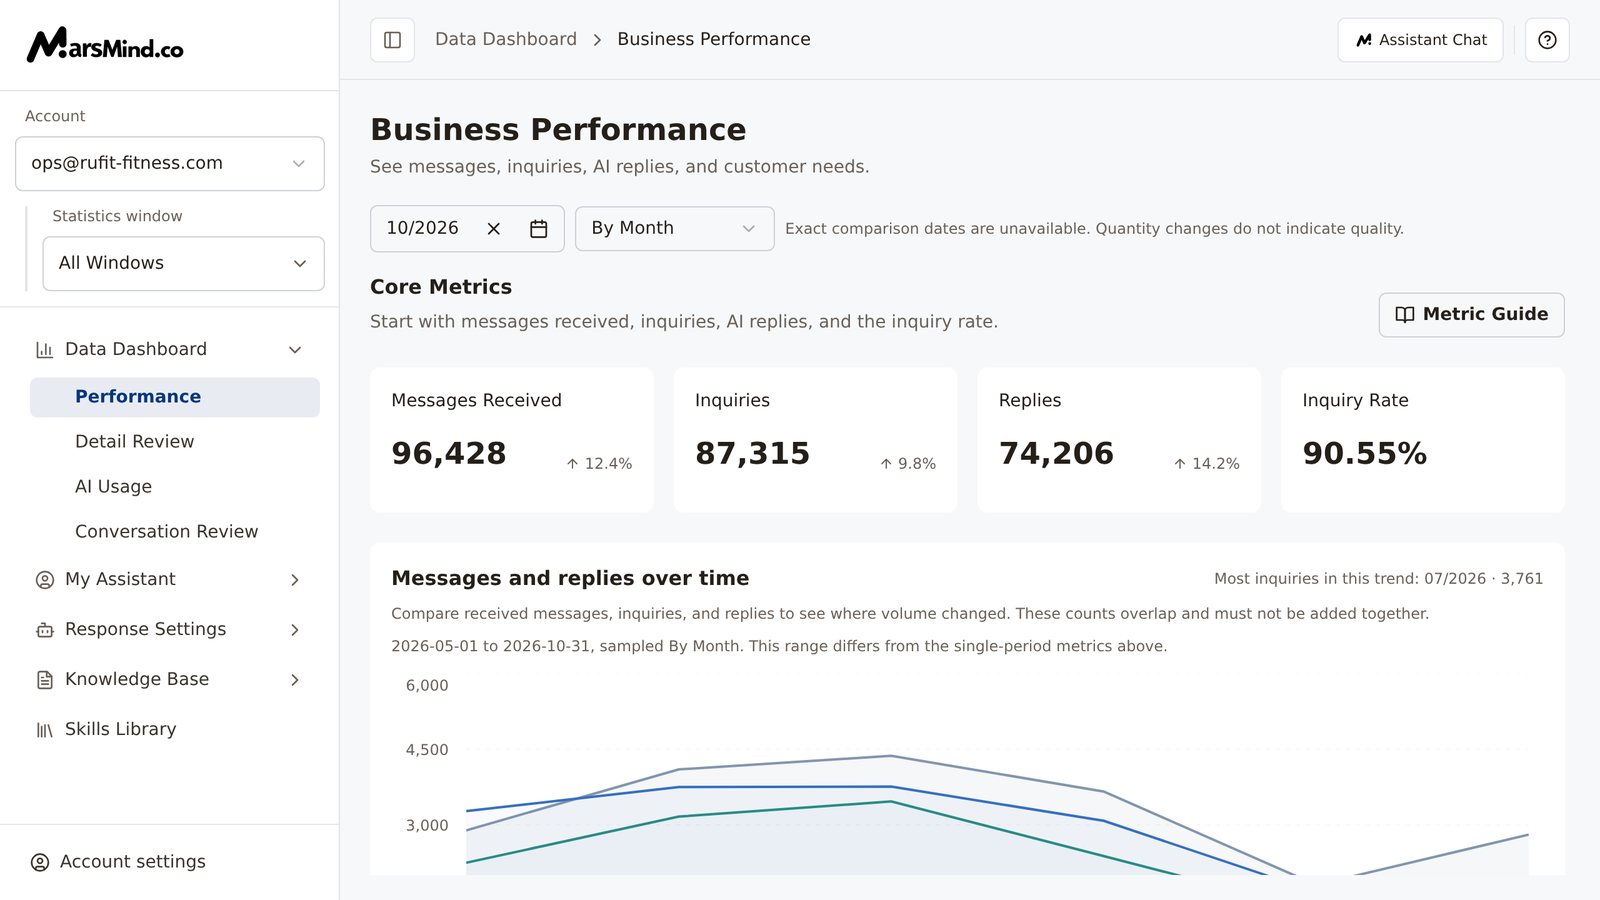
1
Tour the five modules in the left menu
The left menu groups features into five modules. Select a module name with an arrow to expand its pages, then select a page to open it; Skills Library has no subpages — select it to open it directly.
Remember them by purpose: check results in Data Dashboard; connect accounts and set up persona and relationships in My Assistant; define how the assistant replies in Response Settings; give it source material in Knowledge Base; teach it to handle tasks in Skills Library.How to verify: when you open a page under a module, the breadcrumb in the top bar shows Module → Page, for example Data Dashboard → Business Performance. You can tell which module any setting belongs to.
2
Locate Account settings at the bottom left
Account-related actions are collected in the Account settings dropdown at the bottom left: Profile, Login security, AI identity access, Language, and Logout.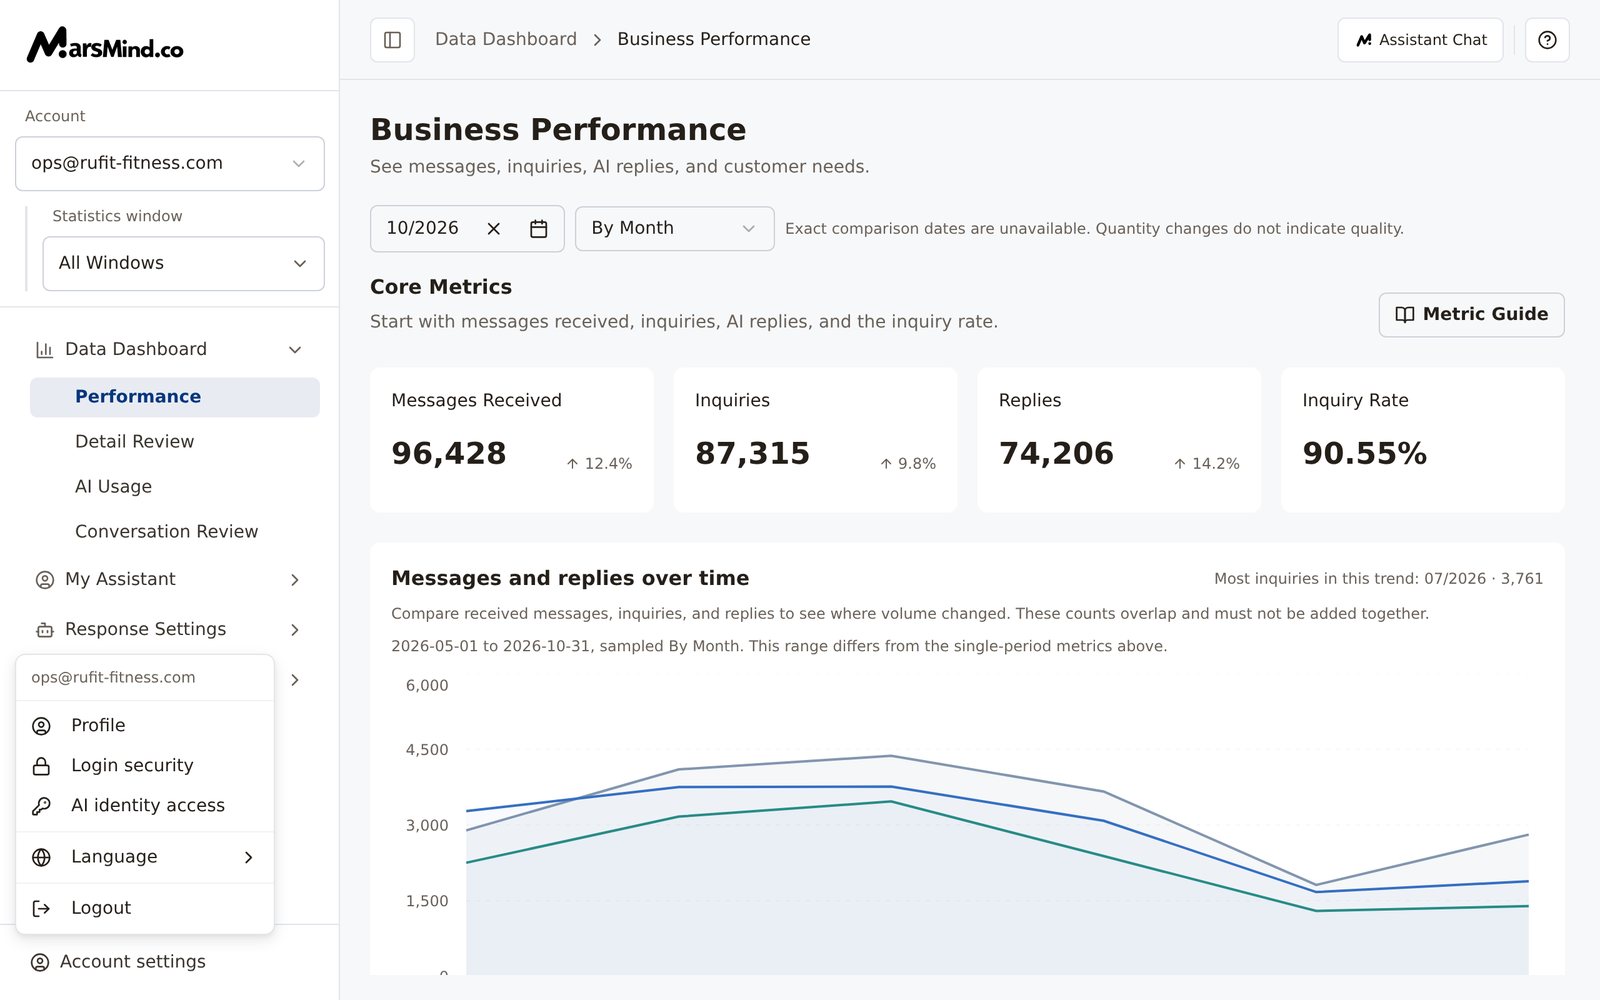
- To view your Supervisor Authorization Code or Colleague Authorization Code, go to AI identity access.
- To change your admin login password, go to Login security.
- To change the interface language, use the Language submenu (five options: 中文, English, 日本語, Français, Español).
- To sign out of the current account, select Logout.
3
Set the Selected window with the window switcher
The window switcher sits below the logo on the left. On the Performance and Detail Review pages it appears as Statistics window, where you can select All Windows to see all channels combined; on other pages it appears as Selected window. On the analytics pages, department admins can also switch Account first.To do it: open the dropdown and select the channel account you want to manage.How to verify: after you switch windows, the data and settings on the page follow the new window. Except on Performance and Detail Review, if no window exists, the switcher becomes a Connect a window button — select it to connect an account on Channel Login. Those two pages keep the Statistics window dropdown, with empty data.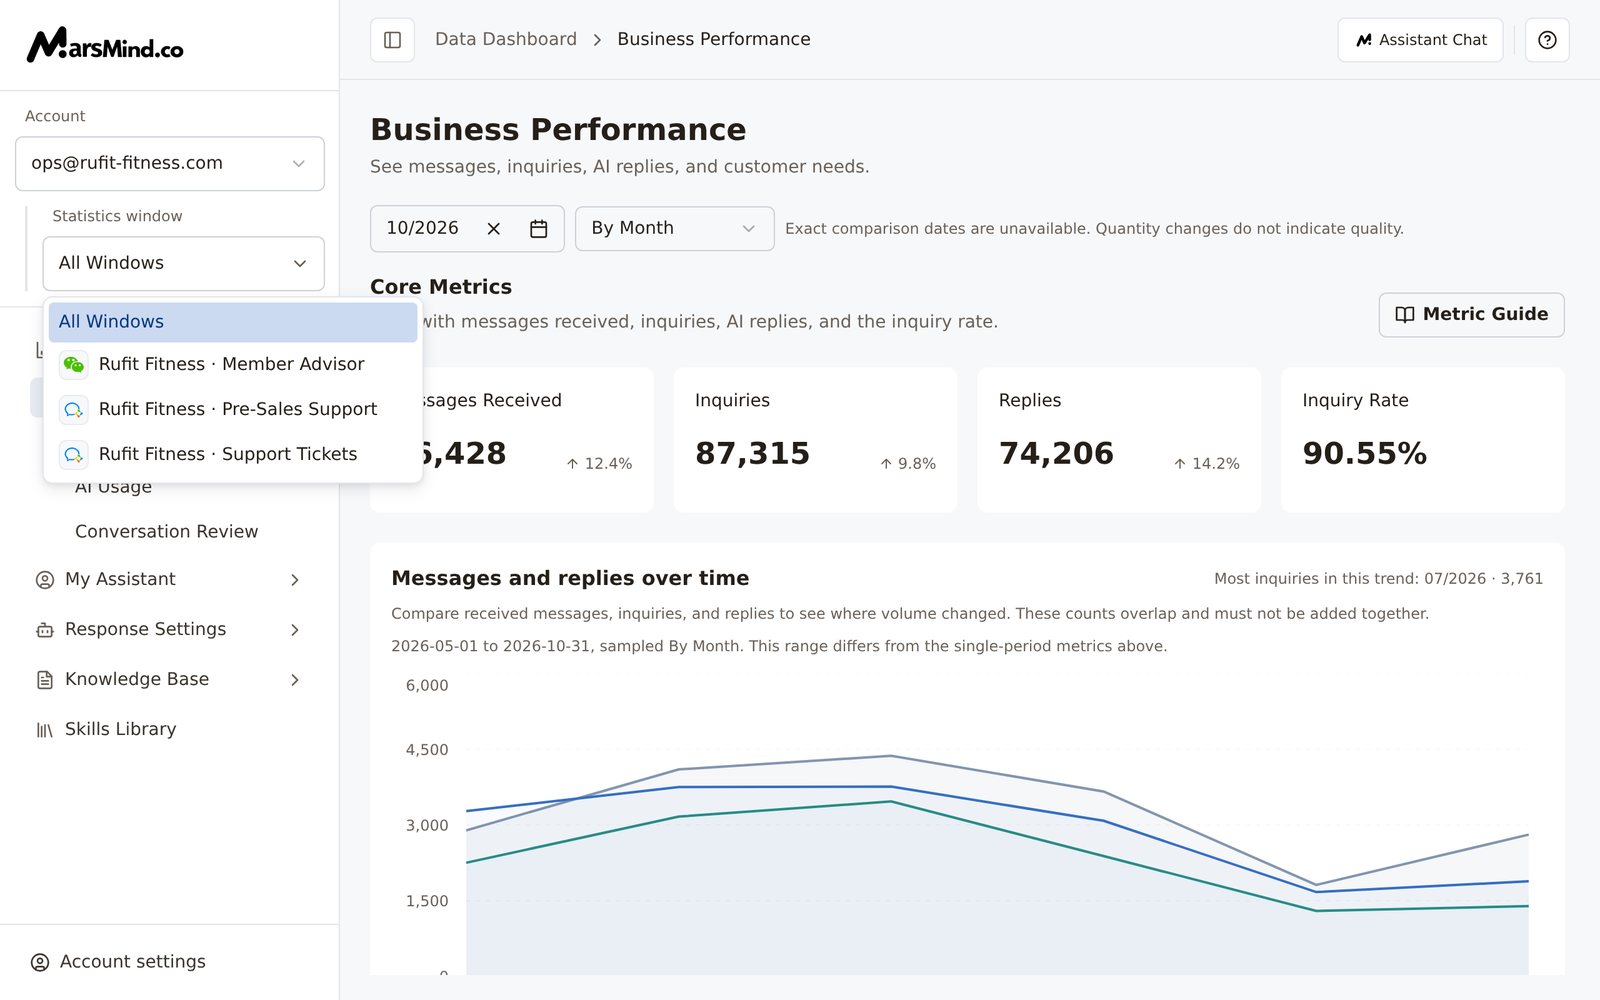
4
Top bar Help and guides: select it when you are unsure
The question-mark button on the right of the top bar (hover text: Help and guides) opens Help Center. It has four guide cards: Dashboard, Assistant Settings, Knowledge Base, and Skills Library. Select Start guide on any card and the system highlights the corresponding entry points on the page step by step; follow Previous and Next at the lower right of the popover to go through it, and the bottom of the popover shows Step X of Y.How to verify: after one full walkthrough, you can point out where each module’s entry sits in the menu.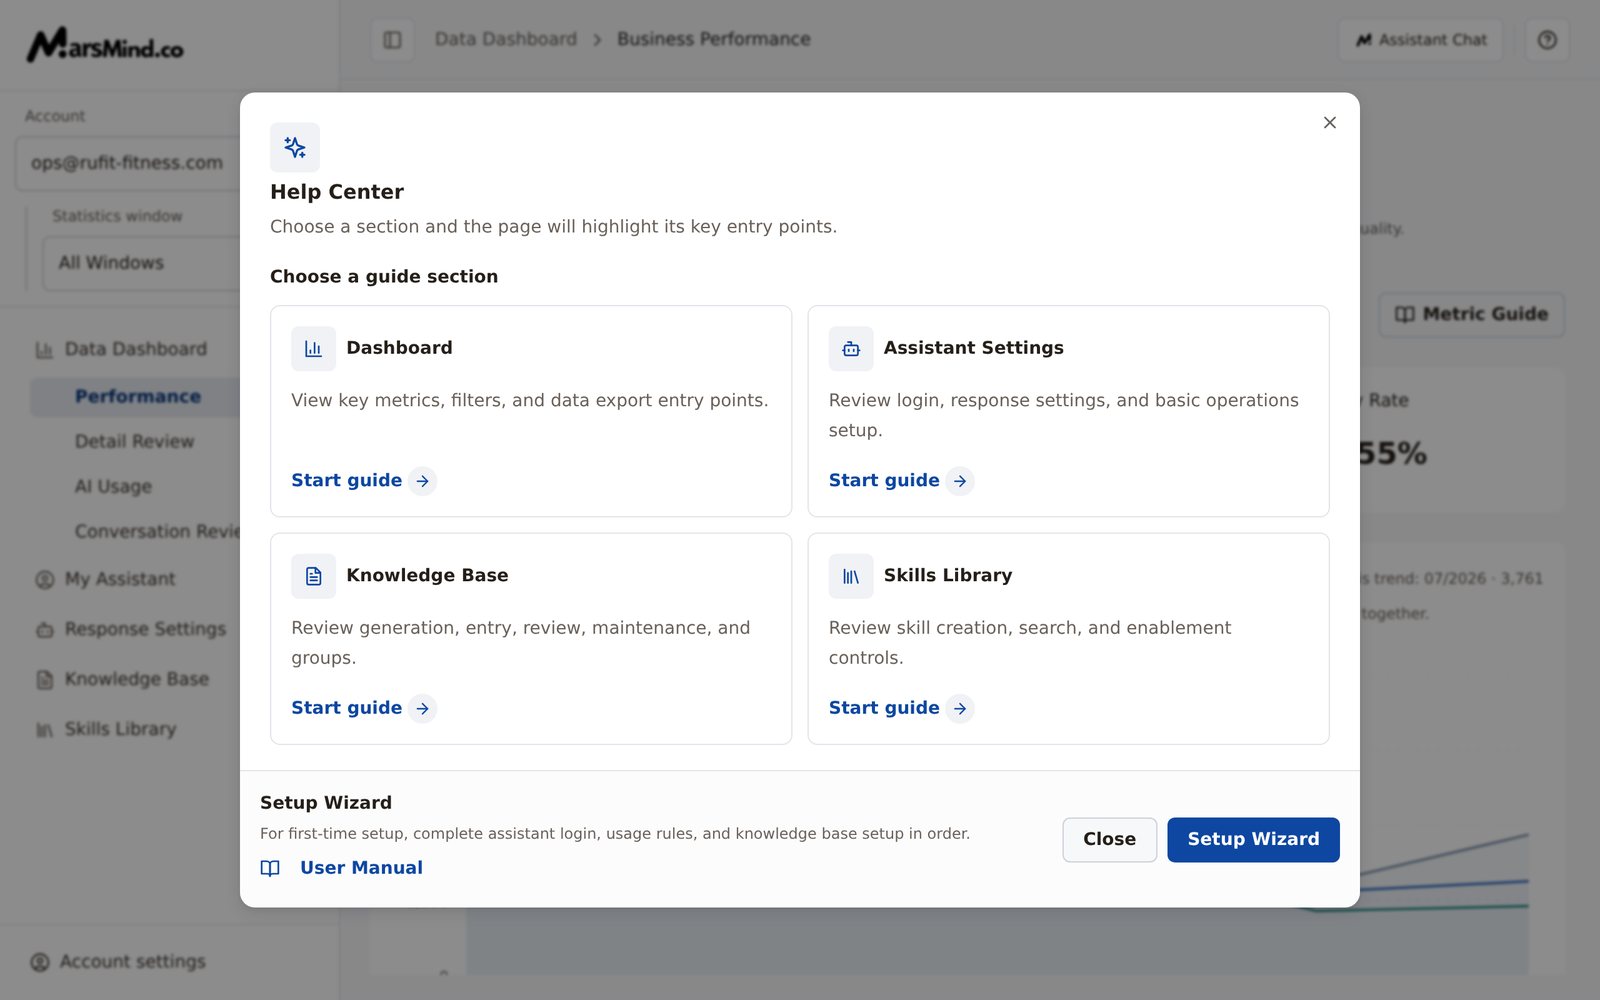
5
Top bar Assistant Chat: look up admin information in a chat
The Assistant Chat button on the right of the top bar opens the Admin assistant chat drawer from the right. Type your message in the input box and send it; type ”/” to get natural-language suggestions (for example, “Please help me organize today’s conversation records”), or type ”#” to list forced commands (for example, 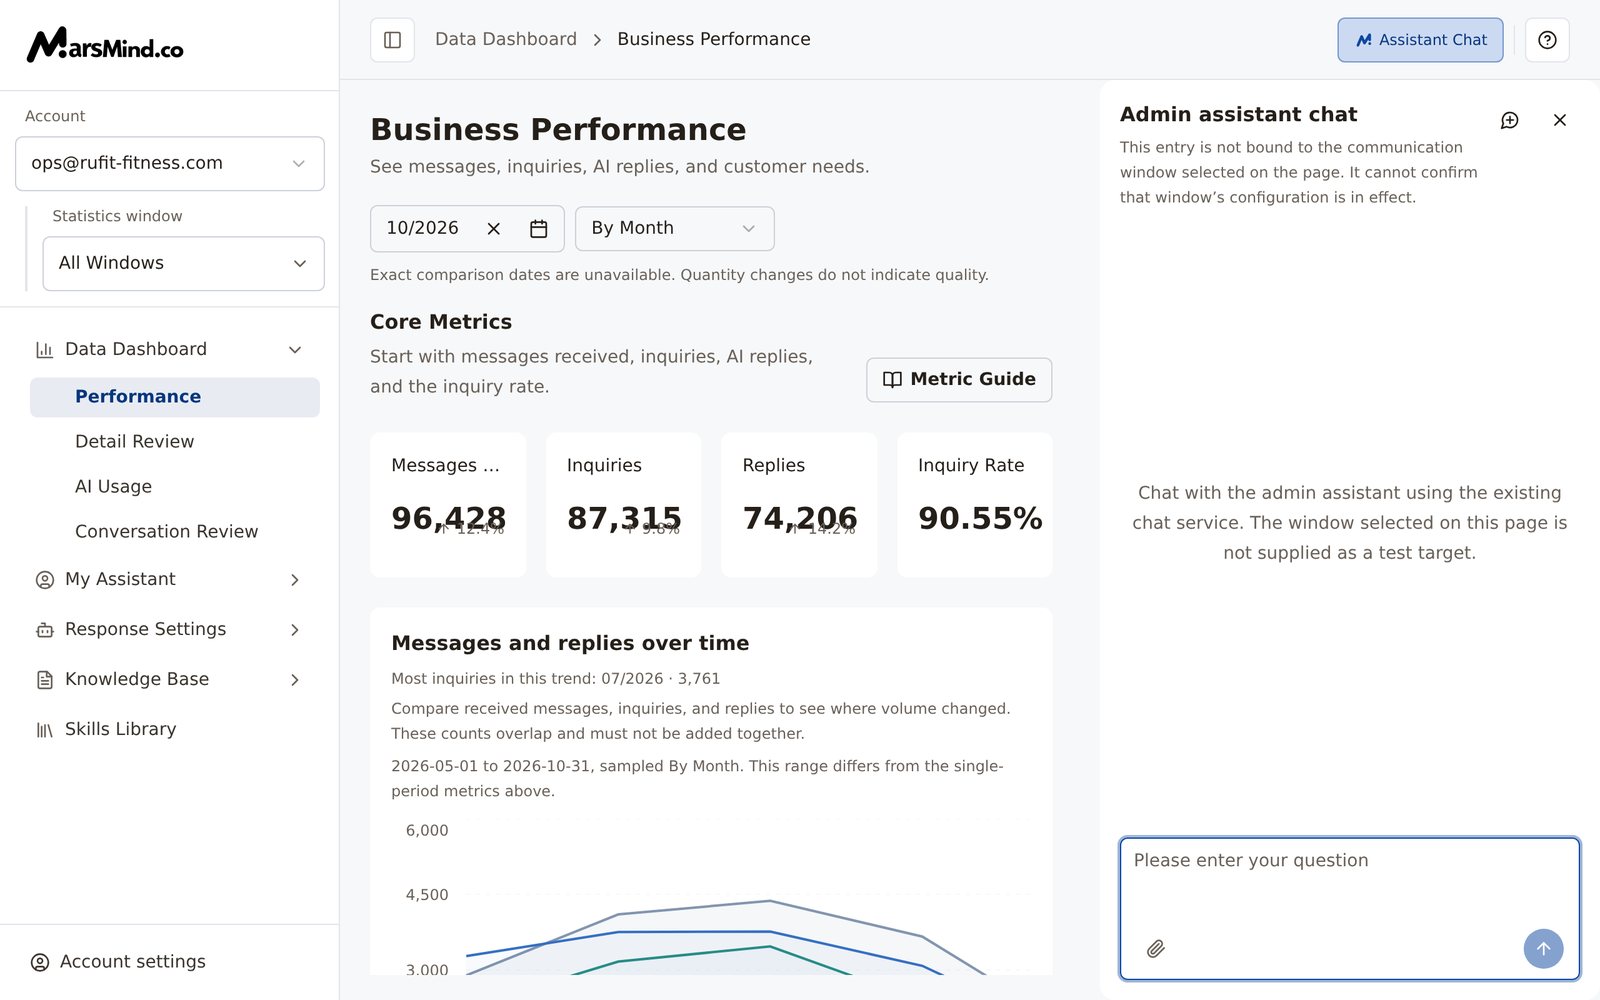
#work to start work, #stop to pause work, and #help to view all commands). You can also select the paperclip icon to upload an image and send it with your message.How to verify: after sending, your message and the AI reply appear in the chat; if sending fails, an error message appears (its text is whatever the server returns).Note: It is not bound to the window selected on the current page, so you cannot use it to verify whether a communication window’s configuration is in effect.6
First login: complete the Initial Setup Wizard
When you log in for the first time with incomplete basic setup, the admin console opens the Initial Setup Wizard automatically and guides you through three steps: Complete assistant login → Configure usage rules → Set up knowledge base. Select the button for the current step — Complete assistant login, Configure usage rules, or Set up knowledge base — to jump straight to the corresponding page.How to verify: when you finish, the wizard shows Initial setup completed. To look around first, select Later (no more prompts this session) or Do not show again (no automatic prompts in the future).To reopen it: open Help and guides → Help Center and select Setup Wizard at the bottom.
Checkpoints
- Using the left menu, you can describe what each of the five modules is for.
- The window switcher shows the window you want to manage instead of Connect a window.
- You can find Assistant Chat and Help and guides on the right of the top bar.
- Account settings at the bottom left opens the three account pages, and you found where to change the language.
Some entries appear based on permissions: AI Usage is visible only to department admins, and Conversation Review is visible only to the Mercado team or platform admins. If an entry is missing from the menu, it is usually not a malfunction — contact your admin to confirm.