

When you’ll need this
- After you connect a new window, set the hours it serves customers.
- You need to temporarily adjust the hours for a few days during a holiday or event.
- Your customers or team are overseas, so you schedule by a specific UTC offset.
- Replies look wrong, and you want to check whether the service hours are misconfigured first.
How to get there
Left menu → Response Settings → Service Time. When the page opens, check the Selected window at the top of the left sidebar (below the logo) first: the weekly schedule, time zone, and specific dates are all saved per window, so switching windows shows a different set of settings. If no window is available, the page shows “No communication window is available”; click “Go to channel login” to connect one first (see Channel Login).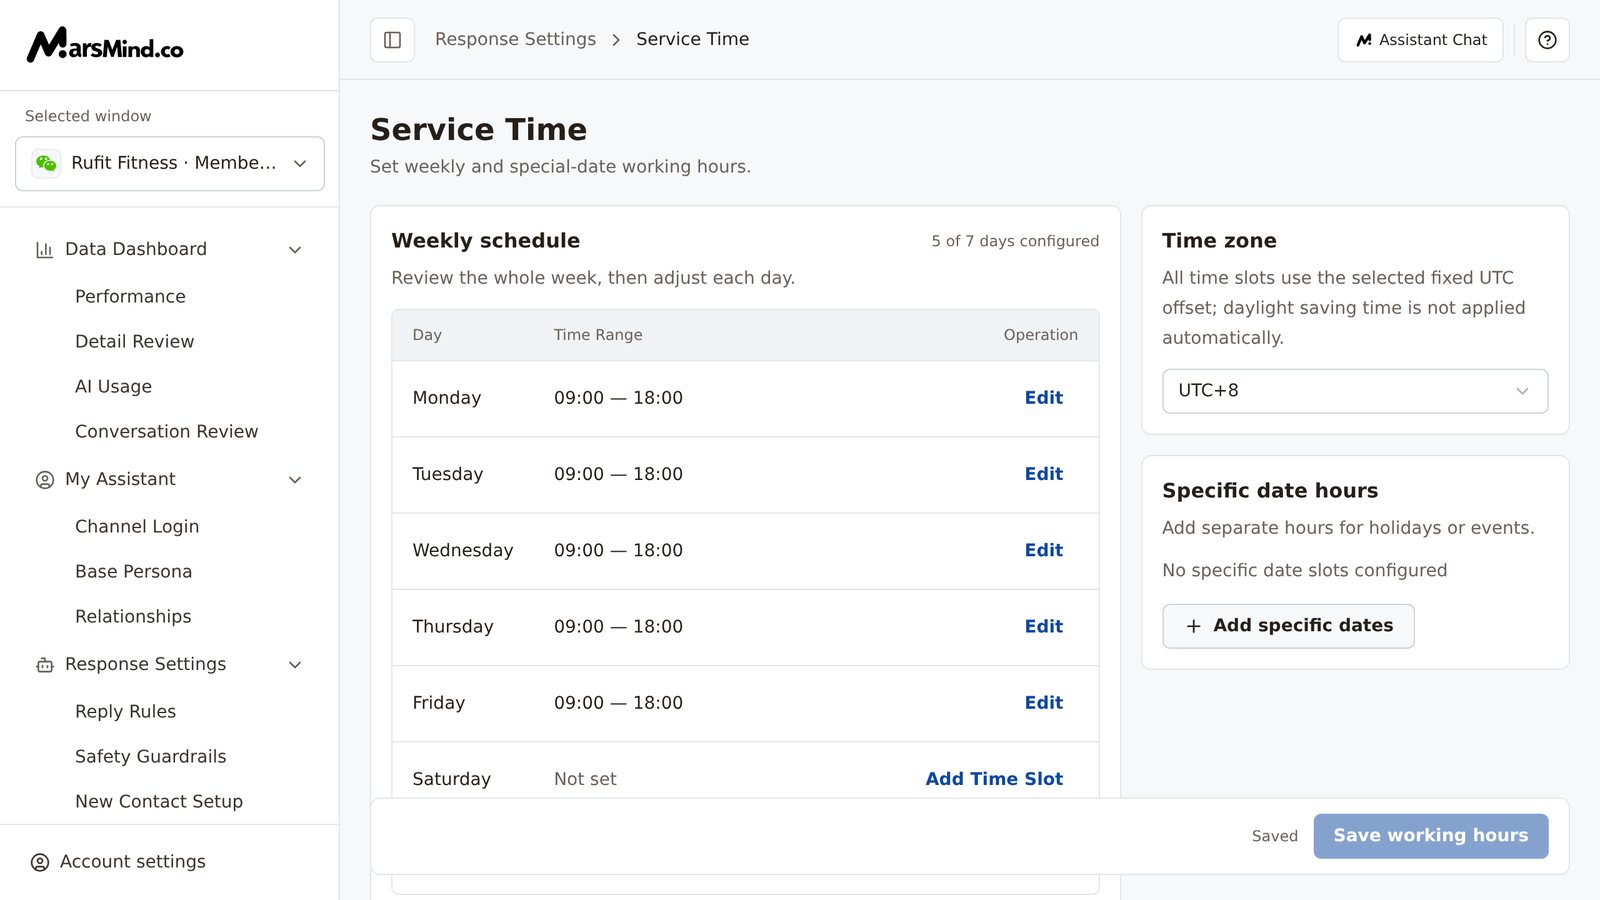
Steps
1
Confirm the Selected window
The weekly schedule, time zone, and specific dates are all saved per window. Before you continue, confirm that the Selected window at the top of the left sidebar (below the logo) is the window you want to schedule.How to tell it worked: the window name matches the one you want to configure. If the page shows “Could not load settings for this window. Retry before editing or saving.”, click “Retry” first, and do not edit until it loads successfully.
2
Set up the weekly schedule
In the “Weekly schedule” card, click “Add to multiple days” (you can also click “Add Time Slot” next to a single day; days that are already set show an “Edit” button). The dialog description reads “Enter valid start and end times, or select All day. You can set up to three time slots.” In the dialog: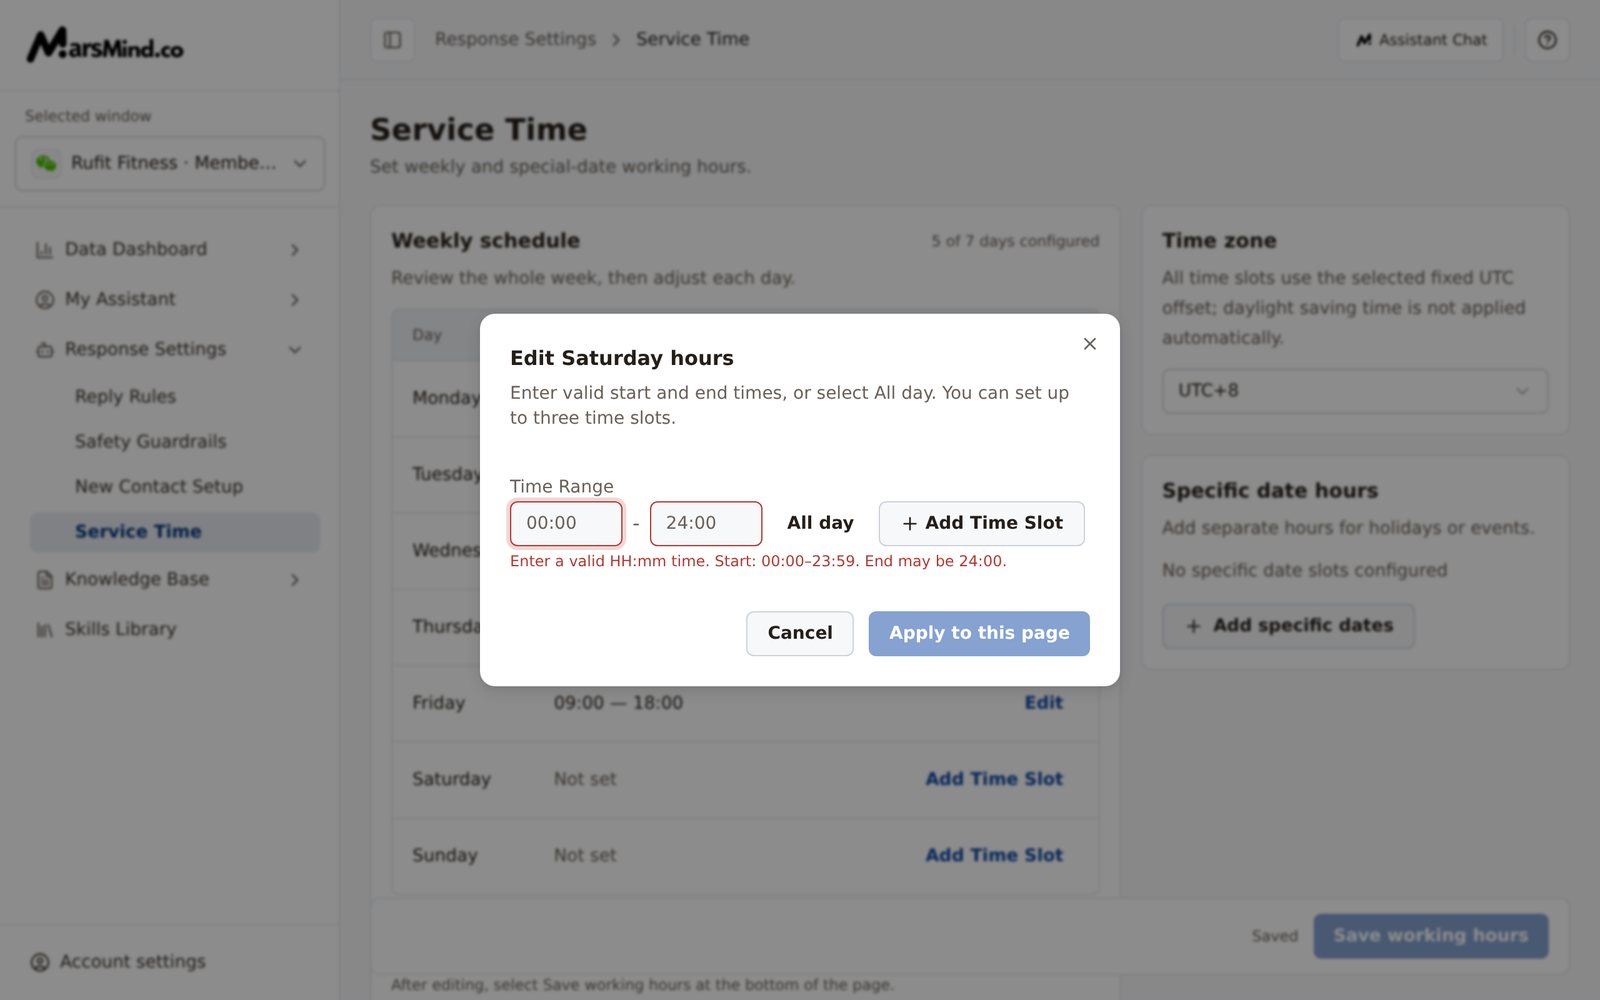
- Select weekdays: check Monday through Sunday one by one, or use “Select weekdays” (Monday–Friday) and “Select every day” (Monday–Sunday) for quick selection. When you edit a single day, the title reads “Edit Monday hours” and the weekday is fixed to that day.
- Fill in the “Time Range”: type the start and end times as plain text in HH:mm format, for example
09:00and18:00. To cover the whole day, click “All day” to fill in00:00–24:00automatically. For more slots, click “Add Time Slot”; each day supports up to 3 slots. - Click “Apply to this page”; clicking “Cancel” discards this entry.
3
Choose the time zone
In the “Time zone” card, choose a fixed UTC offset from the dropdown (17 offsets in total, for example UTC±0 and UTC+8). A window that has never been configured defaults to UTC+8.How to tell it worked: the dropdown is set to the UTC offset you schedule by, and the hours you entered in the previous step are the times for that offset.Note: “All time slots use the selected fixed UTC offset; daylight saving time is not applied automatically.”
4
Add specific date hours (if needed)
In the “Specific date hours” card, click “Add specific dates”. In the dialog, select a date range — when it shows “Please select date range”, open the calendar and pick the start and end dates in order (the desktop view shows two months at once). Then enter up to 3 time slots as in the weekly schedule and click “Apply to this page”.How to tell it worked: an entry in the format “2026/10/01 — 2026/10/07” appears in the card with its slots; when nothing is configured, the card shows “No specific date slots configured”.Note: you can add at most 3 specific dates; once they are full, the “Add specific dates” button no longer appears. The delete icon to the right of an entry removes just that entry.
5
Save all changes
Once the weekly schedule, time zone, and specific dates all look right, click “Save working hours” at the bottom right of the page.How to tell it worked: a “Save successful” message appears, the bottom status changes from “Unsaved” to “Saved”, and the “Save working hours” button becomes disabled. Only now are your changes actually saved.
Checkpoints
- The Selected window on the left is the target window.
- Every day you want to serve has slots, with no unexpected “Not set”; the “N of 7 days configured” counter in the top-right corner of the card matches what you expect.
- “Time zone” is set to the target offset, and all slot values match that UTC offset.
- Specific date entries (if any) number no more than 3, with the correct date ranges and slots.
- After saving, the bottom status shows “Saved” and a “Save successful” message has appeared.
Important notes
Times are plain text inputs, not a time picker: use the HH:mm format, with start times from 00:00 to 23:59 and end times up to 24:00. If the format or order is wrong, red text appears below the input (for example, “End time must be later than start time.”), and “Apply to this page” cannot be clicked.
Up to 3 slots per day and 3 specific date entries; slots in the same dialog cannot overlap with each other, and a slot that overlaps the existing configuration on the same weekday and time is rejected with “This time slot overlaps an existing slot for Monday. Adjust it and try again.”.