

Base Persona decides who the AI is and how it speaks in the selected communication window: set the tone in AI Style, write the main prompt in Custom Instructions, and use Context Settings to control what is injected into replies. Settings on this page apply only to the “Selected window” on the left.

When you’ll need this

  • You just brought a new window online through Channel Login and want the AI to greet customers with your business identity and tone.
  • The AI’s name, tone, or response principles are not right, and you need to edit the main prompt.
  • Your business scenario has changed (for example, from pre-sales consulting to after-sales support), so you want a different style.
  • You want to check which conversation scenes, user profiles, and other information are injected into AI replies.

How to get there

Left menu → My Assistant → Base Persona. When the page opens, check the Selected window on the left first: all settings on this page are saved per window, so after you switch windows you see another window’s settings.
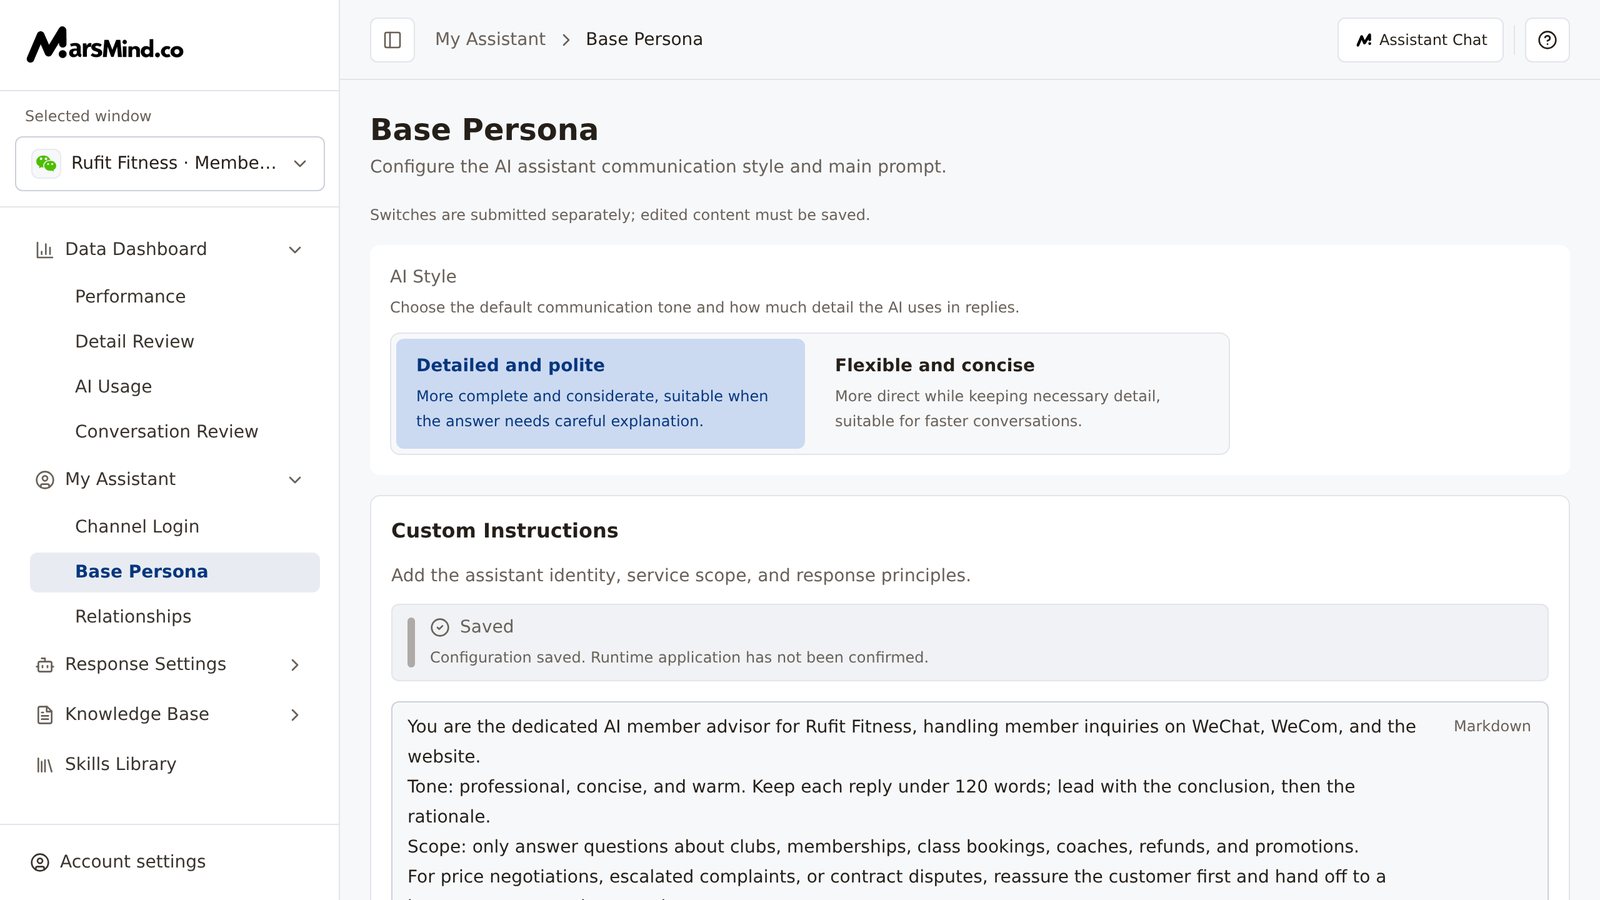
Full Base Persona page: the AI Style options Detailed and polite and Flexible and concise at the top; the Custom Instructions main prompt editor, History Records and AI Polish buttons, and the save status below; the Context Settings card collapsed by default
When no window is selected, the page only shows “No communication window is available”, “Log in and bring a non-admin communication window online before continuing.”, and a “Go to channel login” button; editing is unavailable at this point.

Steps

1

Confirm the Selected window

Base Persona, Relationships, and Response Settings are all saved per window. Before you start editing, confirm that the Selected window on the left is the window you want to configure.How to tell it worked: the dropdown shows the name of your target window.Note: with unsaved content, switching windows or menus first triggers the “Discard unsaved changes?” prompt; choose “Keep editing” to stay on the page and keep going.
2

Choose an AI style

AI Style has two options. Selecting one saves it immediately; there is no separate save button:
  • Detailed and polite: fuller wording and a more considerate tone, for scenarios that need careful explanation.
  • Flexible and concise: more direct answers that keep the necessary detail, for moving conversations forward quickly.
How to tell it worked: the selected side is highlighted and an “AI style switched to …” message appears. The persistent notice at the top of the page, “Switches are submitted separately; edited content must be saved.”, refers to this.Note: if the update fails, the option reverts to the previous side and an error appears; select it again to retry.
3

Write and save the main prompt

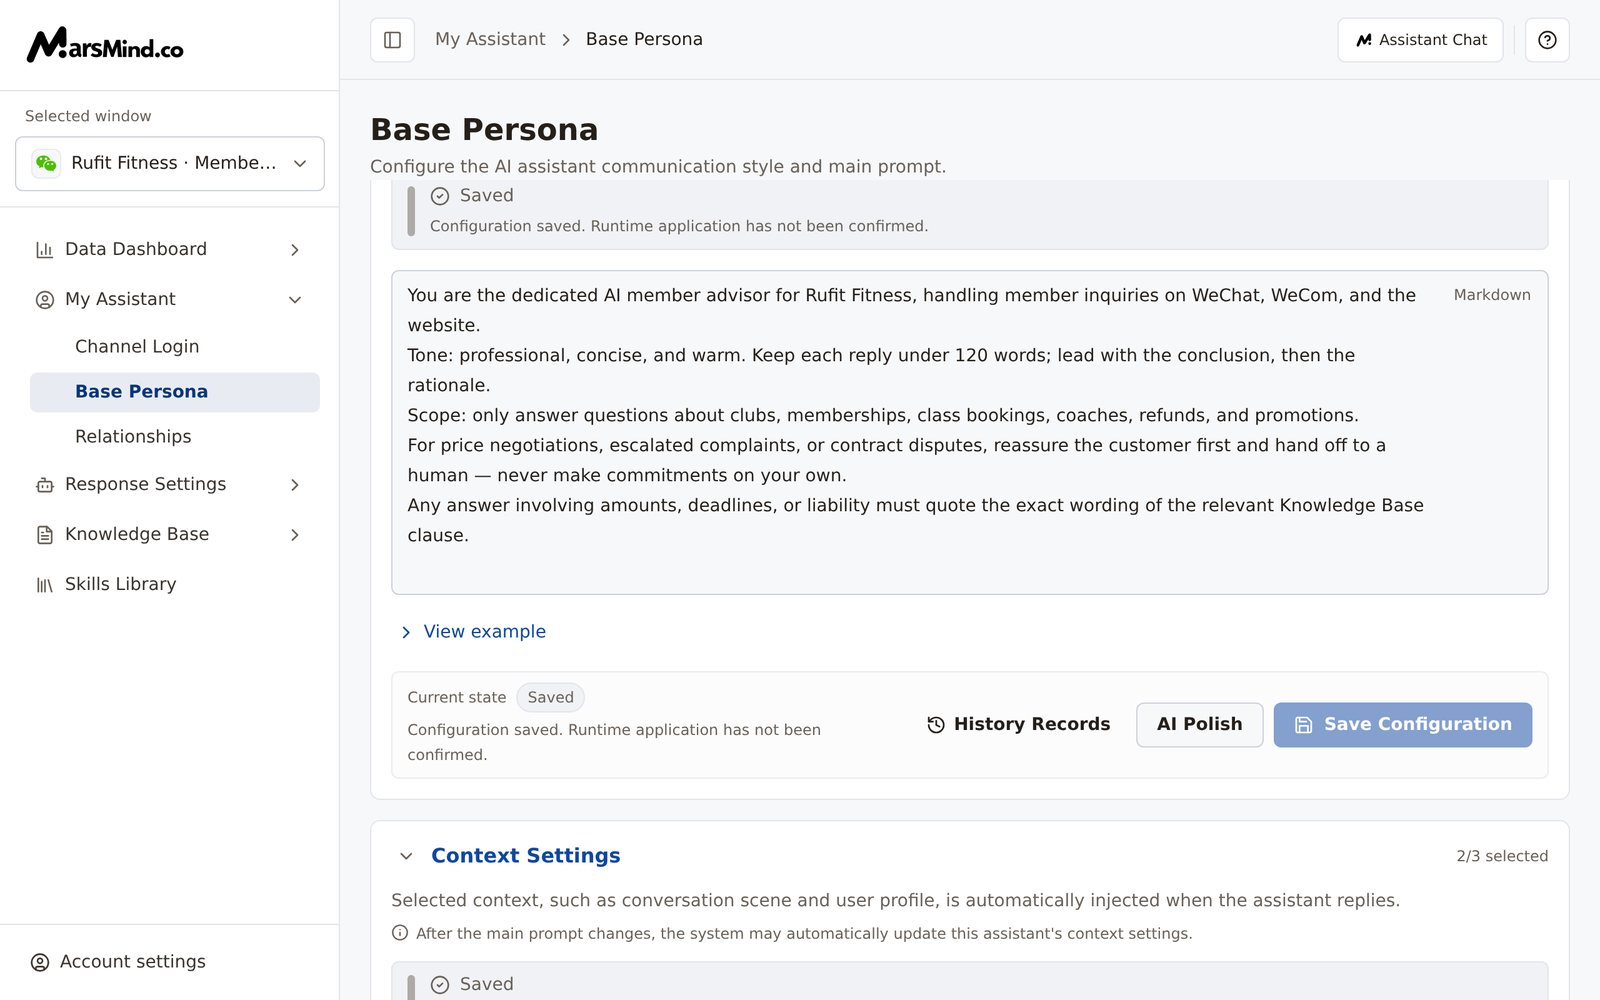
In the Custom Instructions card, write the main prompt: state the AI’s identity, service scope, and response principles. The editor placeholder reads “Describe the AI assistant persona, communication tone, and response principles.” If you are not sure how to write it, select “View example” to expand a set of reference examples.Below the editor is the card’s save area:
  • Save Configuration: available only when the content has changed. After a successful save, the status changes from “Unsaved” to “Saved” or “Saved · Runtime unconfirmed”.
  • History Records: lists past versions, such as “10/4 14:30 Version”. Selecting a version opens a comparison dialog: Current draft on the left, Candidate text on the right. “Apply candidate” only places the content back in the editor — you still need to select “Save Configuration” to actually save it; “Keep current draft” closes the dialog. If the current draft has unsaved changes, the dialog warns that applying the candidate will replace them.
  • AI Polish: generates a candidate based on the current editor content; likewise, confirm it in the comparison dialog before saving. The button is unavailable when the content is empty.
How to tell it worked: the status is no longer “Unsaved”. “Saved · Runtime unconfirmed” means the configuration is saved to the backend, but the system has not confirmed that the runtime has applied this configuration.Note: saving the main prompt also updates Context Settings below — this is expected; see the next step.
4

Review Context Settings

Context Settings decides which conversation scenes, user profiles, and other information are automatically injected when the AI replies. The card is collapsed by default; select the title to expand it. The right side of the title shows “x/y selected”.
  • Options are listed by group; expand each group and check what you need. Items labeled “Sensitive” are sensitive context, so decide whether to inject them based on your business needs.
  • AI Suggest automatically checks recommended items based on the current main prompt and shows “Reason: …” under each selected item. The button is available only when the editor contains main prompt content.
  • When you are done, select “Save Configuration” and a “Context settings saved” message appears. These selections are saved separately from the main prompt.
Saving the main prompt also updates this section: the system re-analyzes the new prompt and overwrites the current selections. While it runs, “Updating context settings from the main prompt…” is shown; when it finishes, “Context settings updated from the main prompt”. On failure, the message is “Automatic context update failed. The previous settings are kept; adjust and save manually if needed.” If the automatic result is not what you expect, expand the card, adjust the selections, and save again.If “Unknown or disabled items” appears in the list, those items are no longer in the available options and can only be unchecked.How to tell it worked: the title no longer carries the “Unsaved” badge, and “x/y selected” matches the information you want injected.
Context Settings expanded: options listed by group with the Sensitive badge on some items; the AI Suggest and Save Configuration buttons at the bottom, and the selected count on the right of the card title
5

Handle Derived Prompts (optional)

Derived Prompts is collapsed by default. Once the main prompt is ready, select “Re-derive” and the system generates candidate prompts for each usage point, for you to “Adopt” or “Discard” one by one. Re-derive only generates candidates and writes nothing, so it has no effect on live behavior before you adopt.How to tell it worked: after you handle an item, its “New” badge is gone, and the “N with new candidates” count in the card title decreases or disappears.

Checkpoints

  • The Selected window on the left is the window you want to configure.
  • The AI Style selection matches what you expect, and a switch message appeared when you selected it.
  • The main prompt status is “Saved” or “Saved · Runtime unconfirmed”, not “Unsaved”.
  • The “x/y selected” count in Context Settings matches the information you need injected, and your changes are saved.
  • Send a message through the corresponding channel: the AI’s name, tone, and response principles behave as expected.

Important notes

This page saves per Selected window. Confirm the window is not the wrong one before making changes, or the style and main prompt will be changed on another account.
With unsaved content, leaving the page (switching menus, switching windows, refreshing, or closing the tab) is intercepted by the “Discard unsaved changes?” dialog. Choose “Keep editing” to return and finish your changes, or “Discard changes” to drop them. While a save is in progress, the page asks you to “Wait for the current save or upload to finish before leaving.”
Saving the main prompt also updates Context Settings: the system re-analyzes the prompt and overwrites the selected items. This is expected. If the automatic update fails, the previous settings are kept; adjust and save manually.
The notice at the top of the page, “Switches are submitted separately; edited content must be saved.”: AI Style takes effect the moment you select it, while both the main prompt and the Context Settings selections require “Save Configuration”.
“Saved · Runtime unconfirmed” only means the save succeeded, not that the runtime has applied it. The most direct verification after a persona change is to send a message in a real conversation on that window. The persona only sets the tone and principles: for how to reply when the AI does not know the answer, or whether to speak in group chats, configure Reply Rules; for who can talk to the AI and who stays silent, configure Relationships.

Frequently asked questions

I changed the persona but the AI’s answers are unchanged. What should I check first?

Check three things in order: whether the Selected window on the left is the window you are chatting in — this page saves per window, so it is easy to change another window by mistake; whether the main prompt status is “Saved · Runtime unconfirmed” — the configuration is saved to the backend, but the system has not confirmed that the runtime has applied it; and finally, send a message in a real conversation on that window to verify.

After I save the main prompt, why did the Context Settings selections change?

The system re-analyzes and overwrites Context Settings based on the new main prompt, which is expected behavior. If the automatic result is not what you expect, expand Context Settings, adjust the selections, and select “Save Configuration”. If the automatic update fails, the previous settings are kept and a message explains this.

Why is AI Suggest unavailable?

The editor must contain main prompt content (writing it is enough — saving first is not required); when the content is empty, the button is unavailable. It is also unavailable while the context options fail to load or the system is running an automatic update, so try again later.

I applied an old version from History Records, but nothing changed. Why?

Selecting a version only places its content in the comparison dialog; after you select “Apply candidate”, the content returns to the editor, and you still need to select “Save Configuration” to actually save it. If the dialog warns that the current draft has unsaved changes, applying the candidate replaces them — confirm before applying.

Why can’t I edit the page?

When no communication window is selected, the page only shows “No communication window is available”. Select “Go to channel login” to connect a window first, then come back to this page.