

What it can do for you
The admin console is organized by module and page, and each module covers one job:
At the bottom left, “Account settings” holds account-related actions: Profile, Login security, and AI identity access, plus switching the interface language and logging out.
When you’ll use it
- You get a lot of new friend requests, group chat inquiries, and repeated questions. You want the AI to handle them first, so your team only deals with what it cannot answer.
- Customer inquiries, campaigns, quotes, and after-sales questions are spread across several channel accounts. You want consistent answers everywhere, with records you can review.
- You want AI answers to be sourced — from your company materials and knowledge distilled from real conversations — not improvised. Sensitive content should be blocked up front, or reported to a supervisor.
- Your team has accumulated documents, FAQs, or real chat logs. You want to turn them into knowledge the AI can cite directly, cutting down on repeated answers.
Access the admin console
Open admin.marsmind.cc in your browser. If you already have an account, enter your “Username” and “Password” and click “Login”. If you don’t, click “Register” — registration requires an “Invitation Code”. After you log in, you land on the “Business Performance” page (left menu → Data Dashboard → Performance), the overview of how your AI handles customer conversations: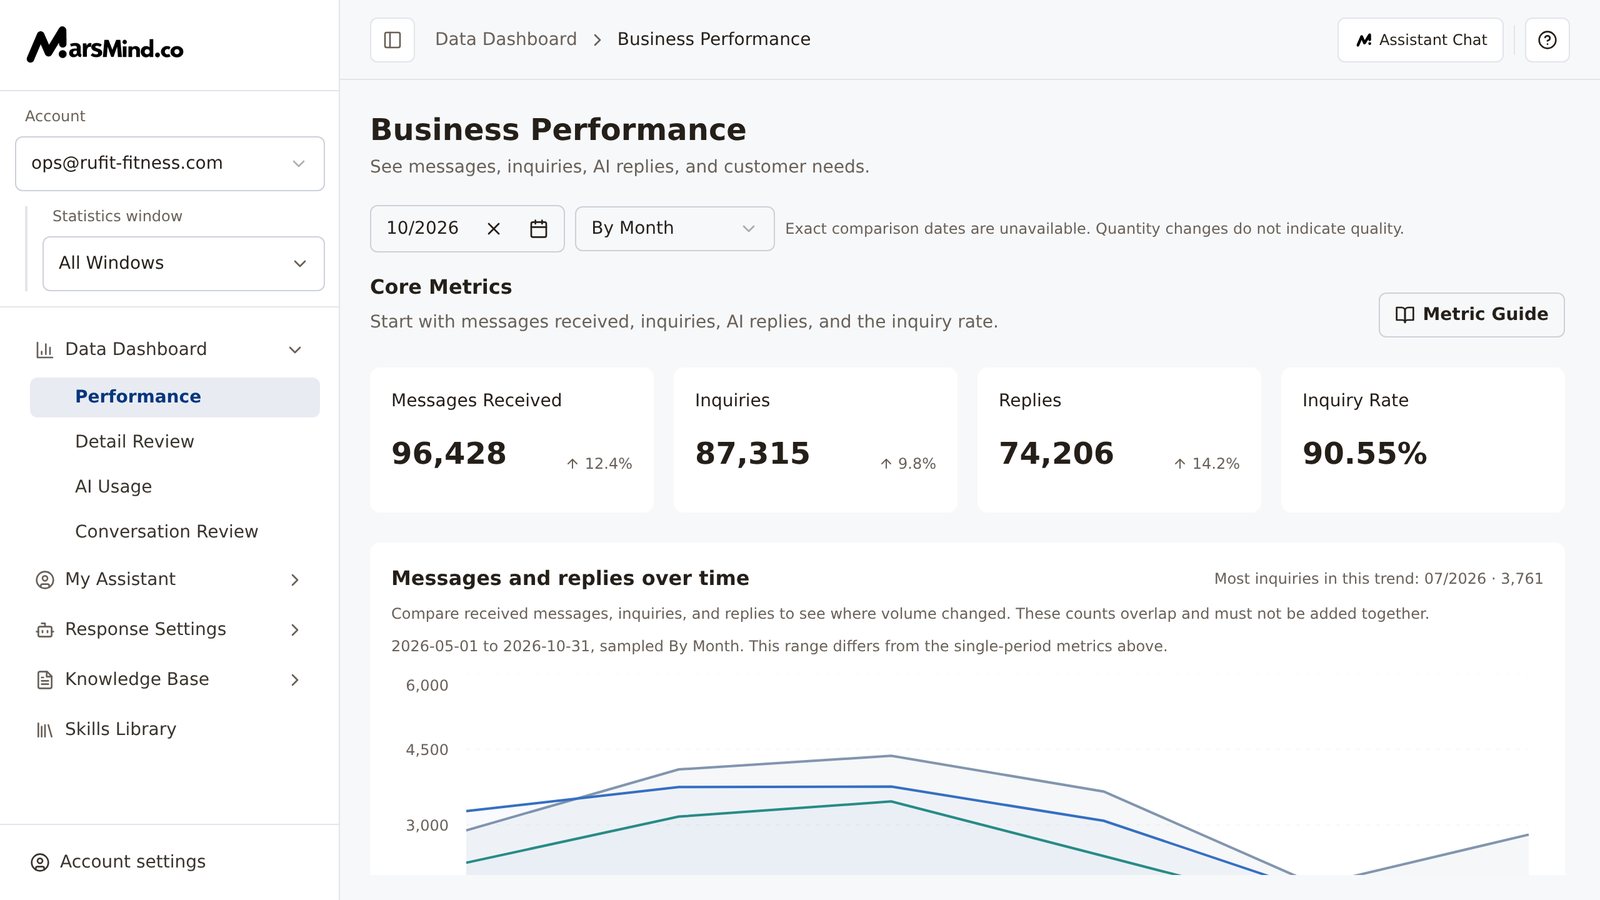
First-time setup order
1
Log in to the admin console
Open the admin console login page and log in with your “Username” and “Password”. If you don’t have an account, click “Register” first: fill in Username, Email, Password, Confirm Password, and “Invitation Code”, then agree to the Terms of Service, Privacy Policy, and Data Usage Agreement.How to verify: after a successful login, the page jumps to “Business Performance” automatically.
2
Set the "Selected window"
The window switcher is at the top of the sidebar, below the logo. On analytics pages such as “Business Performance” and “Detail Review”, it shows as “Statistics window”; on other pages, it shows as “Selected window”. Select the channel account you want to manage this time.How to verify: after you switch windows, the data and settings on the page follow. If there are no windows yet, configuration pages that need one show “No communication window is available” with a “Go to channel login” action; the sidebar switcher turns into “Connect a window” — click it to connect an account.Note: Base Persona, Relationships, and Response Settings are saved per window. If you select the wrong window, your changes land on another account.
3
Walk through the interface with "Help and guides"
Click “Help and guides” on the right side of the top bar to open the Help Center. Pick any section — Dashboard, Assistant Settings, Knowledge Base, or Skills Library — and click “Start guide”. The walkthrough then highlights the relevant entry points on the page, step by step.How to verify: after one walkthrough, you know roughly what each module holds, and you won’t look in the wrong place when you configure the details.
4
Complete the basics with the "Initial Setup Wizard"
When your basic setup is still incomplete, the “Initial Setup Wizard” opens automatically after login and guides you through, in order: Complete assistant login → Configure usage rules → Set up knowledge base. Clicking the button for the current step jumps straight to that page; to look around first, click “Later”.How to verify: once all three items are complete, click “Do not show again” to finish the wizard; the panel shows “Initial setup completed”. To view it again later, reopen it from “Setup Wizard” under Help and guides.Note: “Later” only applies to the current session. After “Do not show again”, the wizard stops opening automatically, but you can still reopen it from Help and guides.Next: for the exact steps, see 30-minute quick start; if your materials aren’t ready yet, start with Activation and preparation.
Checkpoints
- After login, you land on “Business Performance”, and the left menu shows all five modules.
- The “Selected window” in the sidebar points to a real window, and pages no longer show “No communication window is available”.
- All three “Initial Setup Wizard” items are complete — or you know exactly which one is missing and where to finish it.
- You can open the walkthroughs and the “User Manual” any time from “Help and guides”.
Most settings in the admin console follow the “Selected window”: after you switch windows, “Base Persona”, “Relationships”, and “Response Settings” show the settings of the other communication window. The Knowledge Base does not follow window switches — it is organized by “Knowledge Scope” (Personal or Enterprise) and “Knowledge Category”.