

When you’ll need this
- You receive many friend requests and do not want to accept them one by one.
- You want the first conversation after a new contact is added to introduce the assistant, explain what it can help with, and how to reach a human.
- You want the assistant to also collect details such as budget and needs during the chat, so follow-up is easier.
- A friend request was not auto-accepted, or a new contact did not receive the welcome message, and you are here to check the switch and the content.
How to get there
Left menu → Response Settings → New Contact Setup. When the page opens, check Selected window at the top left first: all three cards are saved per window, so after switching windows you see a different set of settings. When no window is available, the page shows “No communication window is available”, “Log in and bring a non-admin communication window online before continuing.”, and a “Go to channel login” button — connect a window through Channel Login first.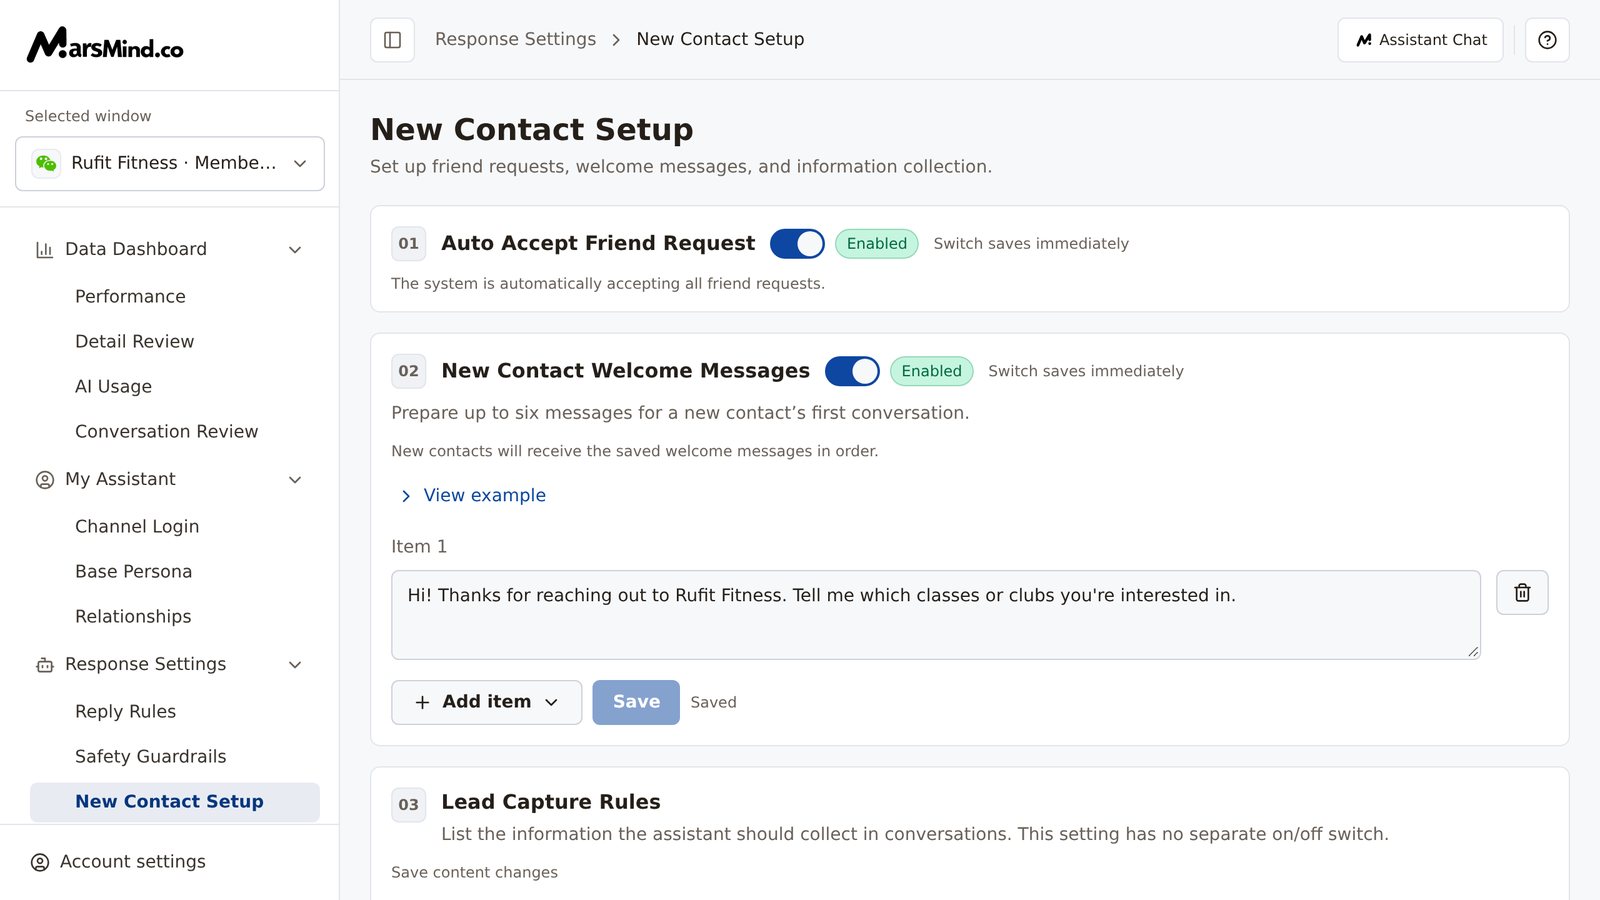
Steps
1
Confirm the Selected window
First confirm that Selected window at the top left is the window you want to configure, then continue.How to tell it worked: the window name matches the assistant window you want to configure.
2
Turn on "Auto Accept Friend Request" (if needed)
In card 01, flip the switch on. It saves immediately — there is no button to click; the badge changes from “Disabled” to “Enabled” and an “Auto accept friend request enabled” notification appears. If you do not want auto-accept, leave it off and go straight to the next step.How to tell it worked: the badge shows “Enabled”.Note: once on, the system automatically accepts every friend request for this window, including ads or people you would rather not add; make sure this window can handle that before turning it on.
3
Add and save welcome message content
In card 02, “New Contact Welcome Messages”, click “Add item” and choose a content type from the dropdown: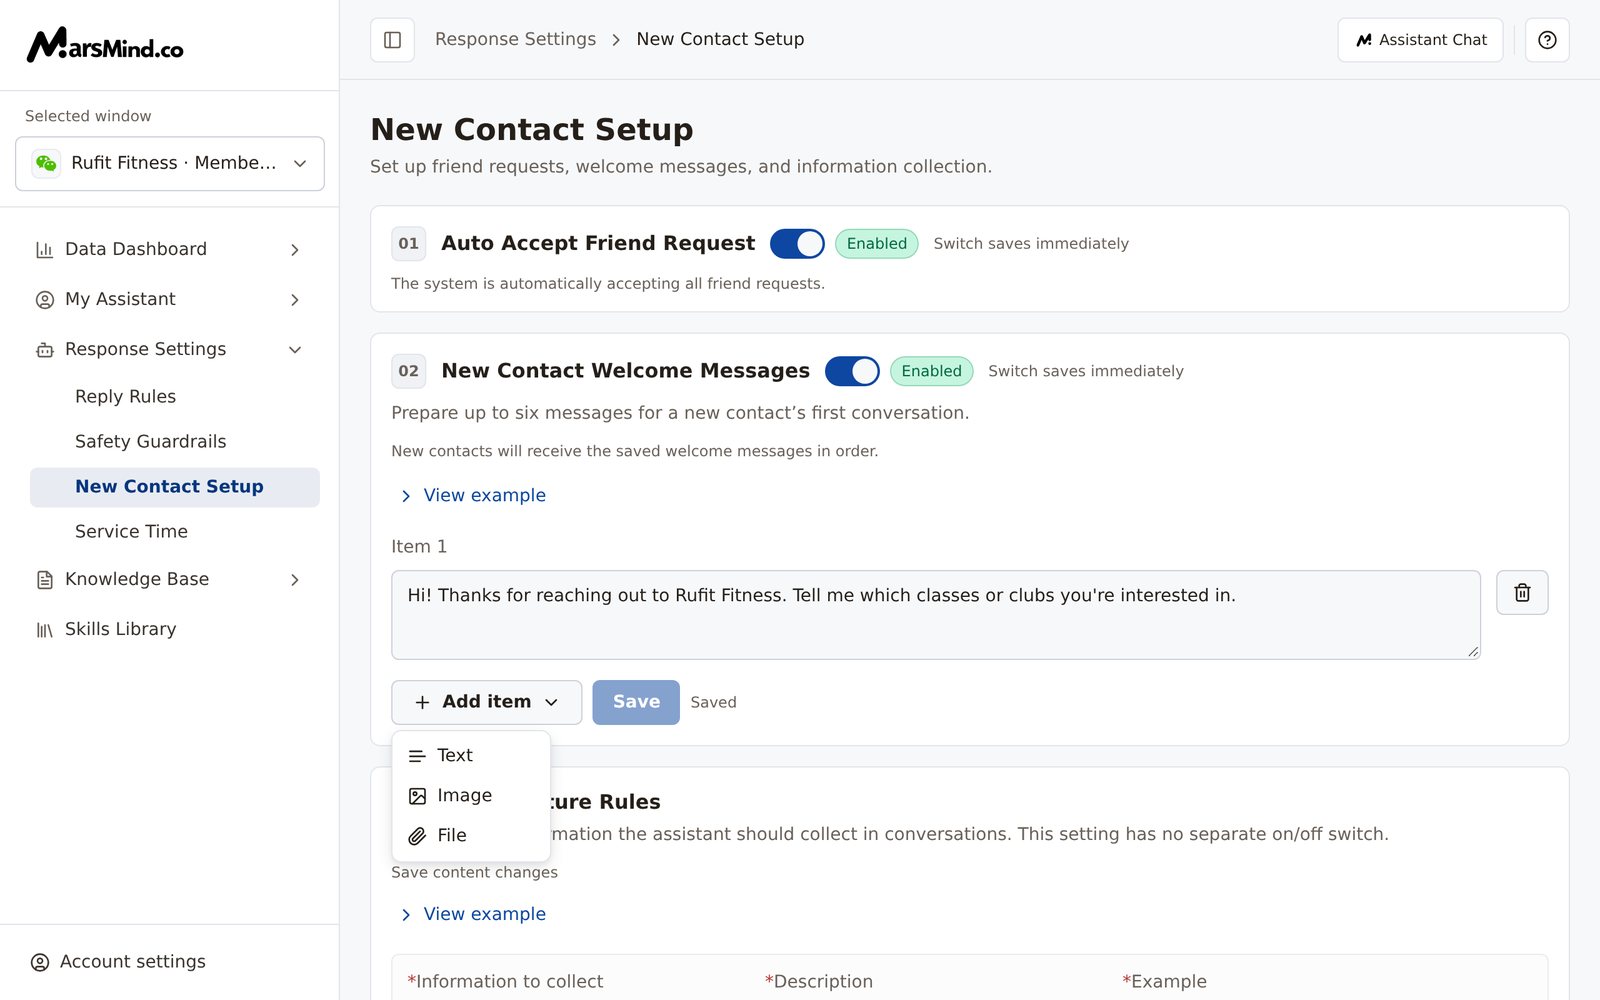
- Text: enter your wording; line breaks are supported;
- Image / File: choose a local file and it uploads automatically; once uploaded, the file name appears. A single image or file cannot exceed 100MB.
4
Turn on the "New Contact Welcome Messages" switch
Once the content is saved, flip the switch in card 02 on; a “New contact welcome messages enabled” notification appears.How to tell it worked: the card summary changes to “New contacts will receive the saved welcome messages in order.” If it instead reads “Welcome messages are enabled, but no content has been saved. Add content and save it.”, the content has not been saved — go back to the previous step and click “Save”.Note: you can turn the switch on first and add content later, but no welcome message is sent until the content is saved.
5
Fill in and save "Lead Capture Rules"
In card 03, click “Add item” to add a row with three inputs: Information to collect, Description, and Example. All three are marked with
* and are required, for example “Budget / The customer’s purchase budget or price range / under CNY 30,000”; click “View example” for a sample.You can add up to 6 items, and each one can be deleted individually. When you are done, click “Save” at the bottom.How to tell it worked: Current state at the bottom changes from “Unsaved” to “Saved · Runtime unconfirmed”, and a “Lead capture rules saved.” notification appears. If you made a mistake, click “Discard changes” to restore the last saved content.Note: this card has no separate on/off switch — after saving, the assistant starts collecting information in conversations using the saved rules; if you do not want collection, delete all items and click “Save” — the status becomes “No custom content”.Checkpoints
- Selected window on the left is the target window.
- The badge in card 01 shows “Enabled” (if you need friend requests auto-accepted).
- The switch in card 02 is on, the summary is “New contacts will receive the saved welcome messages in order.”, and the content status is “Saved”.
- Current state in card 03 is “Saved · Runtime unconfirmed”, all three fields are filled in, and nothing is left “Unsaved”.
- Use a test account to add the window as a friend: the friend request is accepted automatically and the welcome messages are sent in order. Only a real conversation can confirm that the runtime side has applied a “Saved · Runtime unconfirmed” configuration.
Important notes
The three cards save differently: the switches in 01 and 02 save instantly, while welcome content and capture rules are written only when you click “Save”. Switches and content are submitted separately, so you do not need to save content before changing a switch.
After you save capture rules, the status shows “Saved · Runtime unconfirmed”, which means the configuration is written to the backend but there is no confirmation yet that the runtime has applied it; use a real conversation with a new contact to verify.