

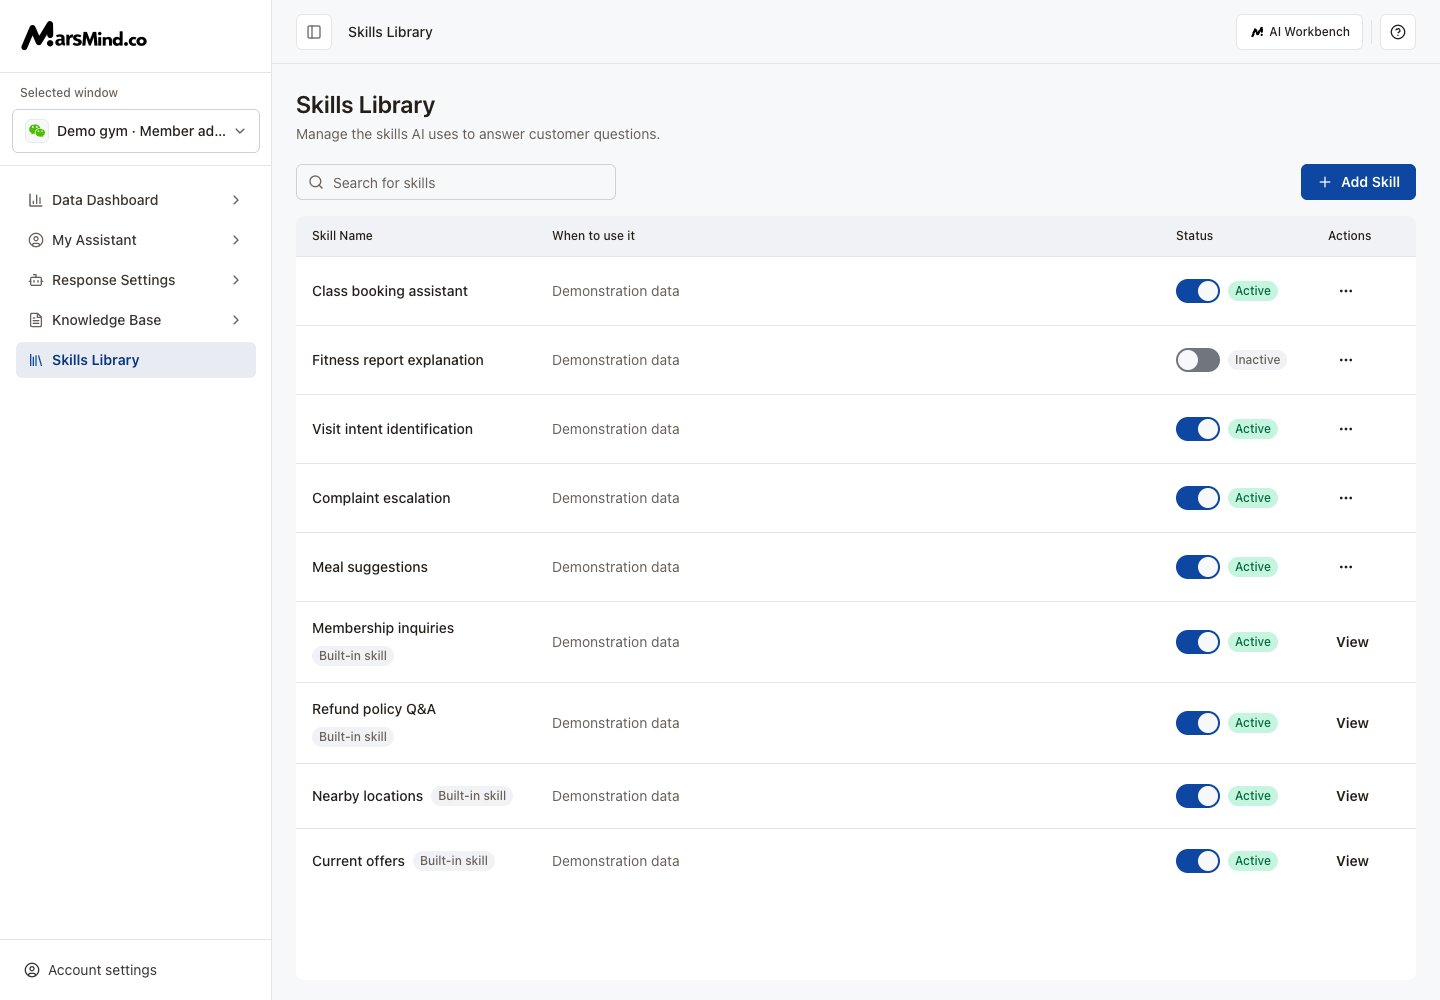
Create a skill
1
Add Skill
Select Add Skill and wait for tool information to load.
2
Skill name
Enter a name, such as “After-sales status lookup.” A name is required; the system generates the skill key.
3
When to use it
Describe when to use it, such as when a customer asks about refund or return progress.
4
How AI should handle it
Write the confirmation, lookup, and reply steps, including missing-information and lookup-failure handling. In an empty field, select Insert writing outline. Type / to insert a tool; inserting it also links it to the skill.
5
Which conversations
Choose Supervisor conversations, Customer conversations, or Both.
6
Tools to use
Expand Tools to use to specify tools. The default is Match tools automatically. With Choose tools manually, expand categories and check tools. Selecting none in manual mode saves the skill without linked tools.
7
Create skill
Select Create skill at the top right. After success, the list returns and the new skill is enabled. Turn off its status switch if it should stay inactive.
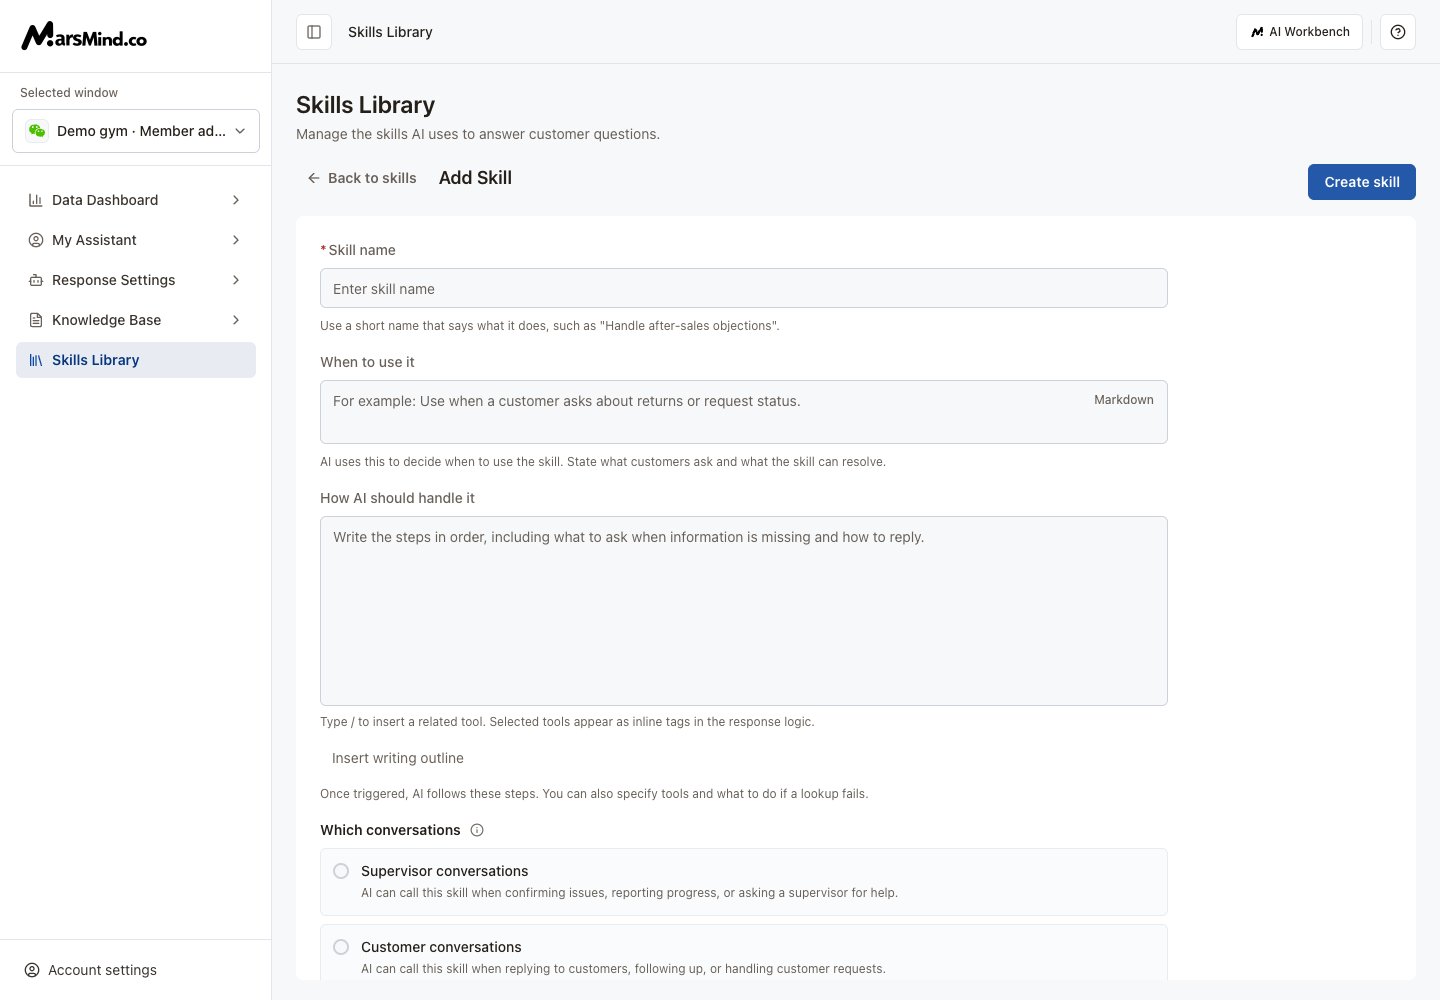
When to use it and How AI should handle it support Markdown or TXT. Selecting a format does not replace creating or saving the skill.
View, edit, and change status
1
Search and view
Search by name or description, then select a skill name or View to open its details.
2
Edit
For a custom skill, select Edit in the detail view or menu, then Save changes. Deselecting every tool and saving removes all tool links.
3
Change status
The list switch saves status separately: Active means enabled and Inactive means disabled. Built-in skills can be enabled or disabled, but their content cannot be edited or deleted.