

Create a group
- Open … → Add Top-Level Group beside Group Structure. An empty page also provides an add button.
- Enter a name and press Enter or click outside the field to finish editing.
- To add a child, open the group’s … → Add Child Group and enter its name. Groups support up to 4 levels.
- Check the enabled switch, then click Save group changes at the bottom.
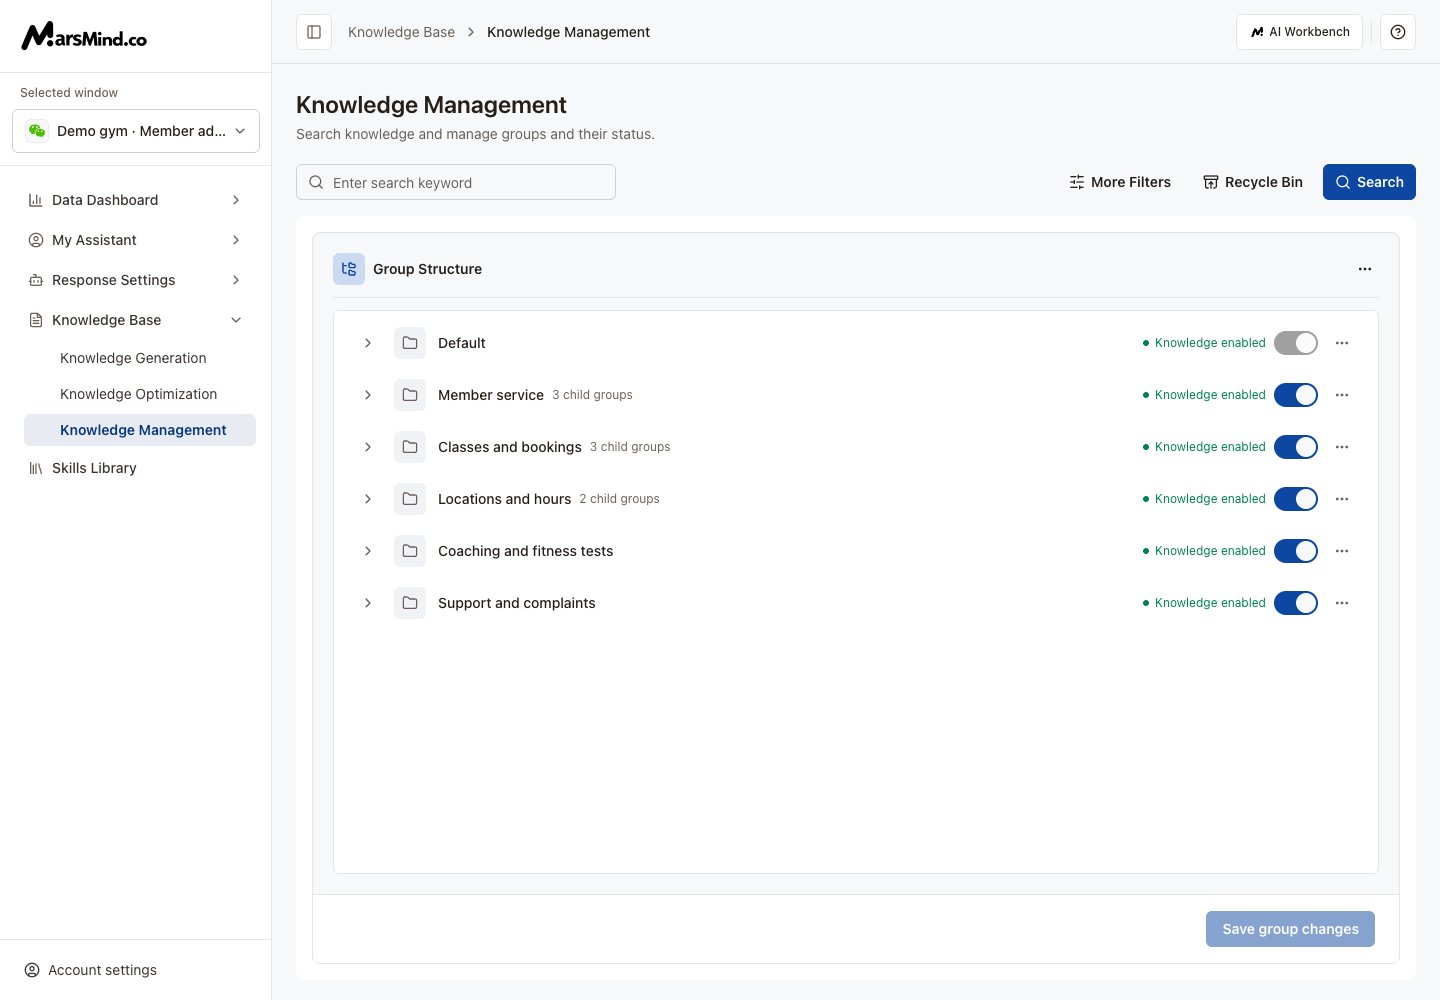
Demonstration group names show hierarchy, enabled switches, and save controls.
Rename or change status
- Open a group’s … → Edit, change the name, and press Enter or move focus away.
- Use its switch to enable or disable the group. The page shows Enable after saving or Disable after saving.
- Click Save group changes and wait for success.
Browse a group’s knowledge
- Click a group name or its right arrow to enter the next level.
- A group without children shows its stored knowledge. Switch between Questions & answers and Paragraph Knowledge.
- Use Back or the breadcrumbs to move up. See knowledge maintenance for editing and deletion.
Delete a group
- Open the group’s … → Delete.
- Check its name and confirm. A saved group is removed immediately; no additional save is needed.