> ## Documentation Index
> Fetch the complete documentation index at: https://docs.marsmind.co/llms.txt
> Use this file to discover all available pages before exploring further.
# Skills Library
> Create business skills, choose conversation scope and tools, and manage status.
View, enable, and create skills for business tasks. Skills belong to the signed-in account and do not change with the sidebar channel selector.
Open: **Skills Library**.
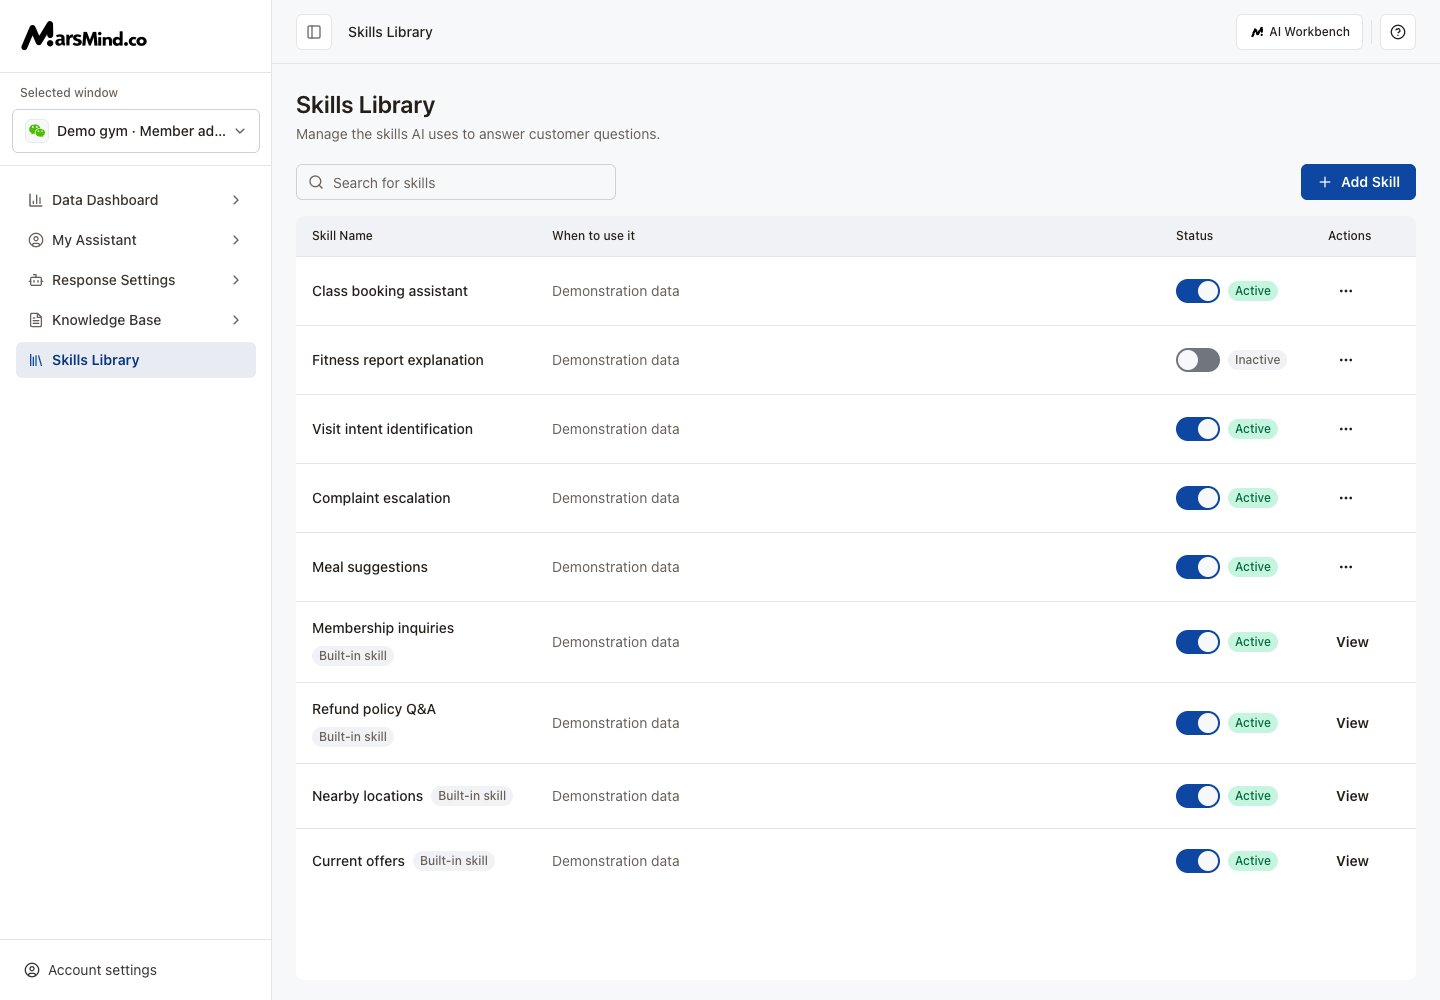 The screenshot uses demonstration data.
## Create a skill
Select **Add Skill** and wait for tool information to load.
Enter a name, such as “After-sales status lookup.” A name is required; the system generates the skill key.
Describe when to use it, such as when a customer asks about refund or return progress.
Write the confirmation, lookup, and reply steps, including missing-information and lookup-failure handling. In an empty field, select **Insert writing outline**. Type / to insert a tool; inserting it also links it to the skill.
Choose **Supervisor conversations**, **Customer conversations**, or **Both**.
Expand **Tools to use** to specify tools. The default is **Match tools automatically**. With **Choose tools manually**, expand categories and check tools. Selecting none in manual mode saves the skill without linked tools.
Select **Create skill** at the top right. After success, the list returns and the new skill is enabled. Turn off its status switch if it should stay inactive.
The screenshot uses demonstration data.
## Create a skill
Select **Add Skill** and wait for tool information to load.
Enter a name, such as “After-sales status lookup.” A name is required; the system generates the skill key.
Describe when to use it, such as when a customer asks about refund or return progress.
Write the confirmation, lookup, and reply steps, including missing-information and lookup-failure handling. In an empty field, select **Insert writing outline**. Type / to insert a tool; inserting it also links it to the skill.
Choose **Supervisor conversations**, **Customer conversations**, or **Both**.
Expand **Tools to use** to specify tools. The default is **Match tools automatically**. With **Choose tools manually**, expand categories and check tools. Selecting none in manual mode saves the skill without linked tools.
Select **Create skill** at the top right. After success, the list returns and the new skill is enabled. Turn off its status switch if it should stay inactive.
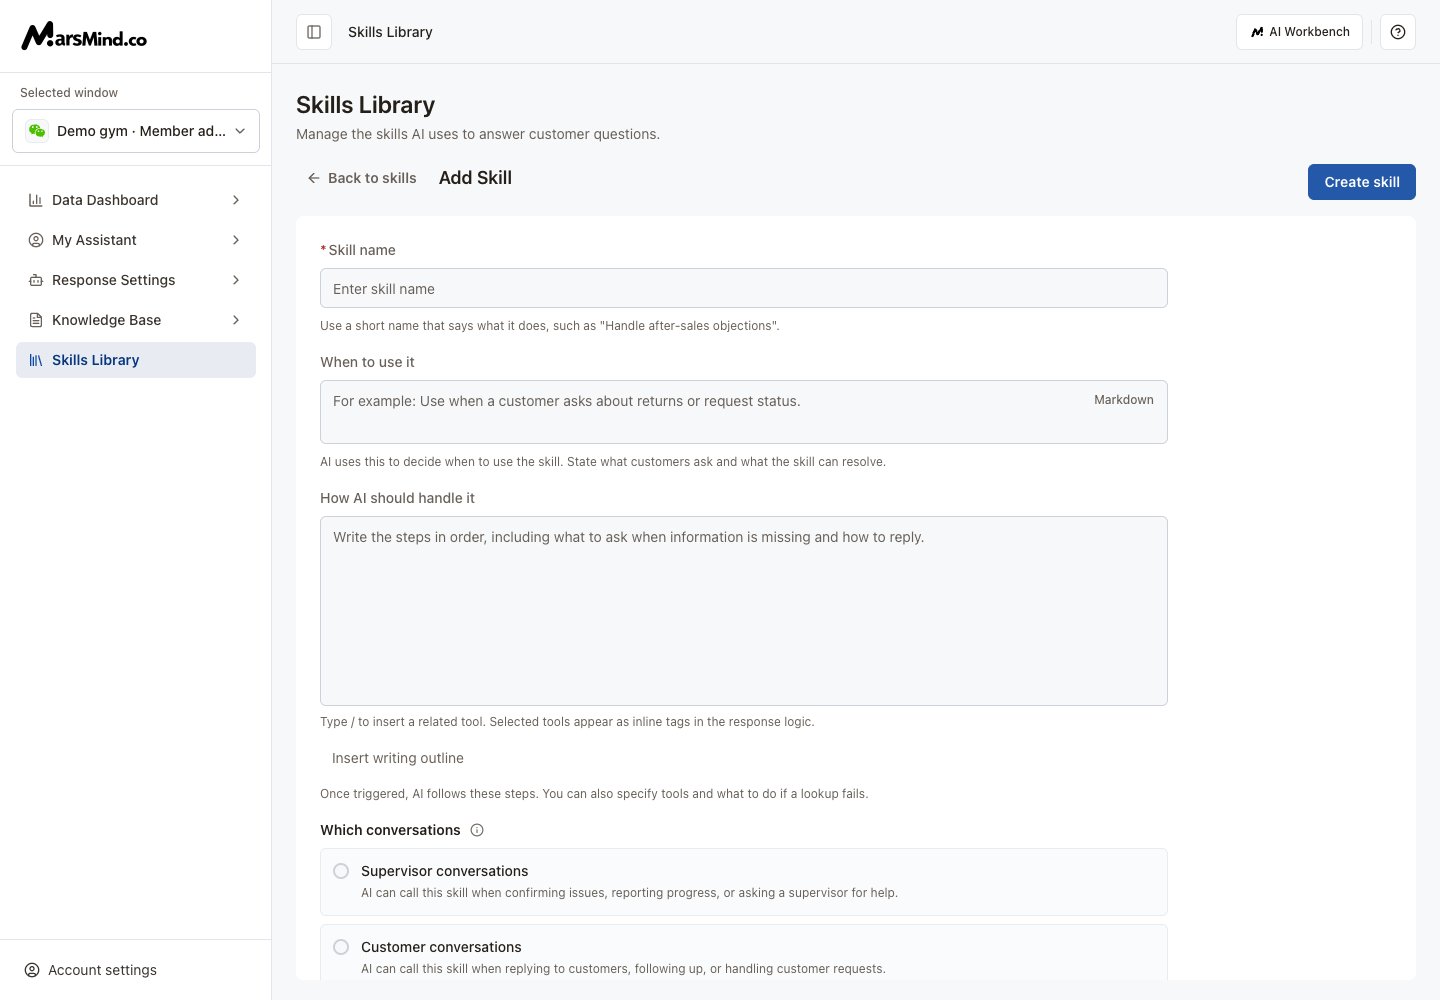 The screenshot uses demonstration data.
**When to use it** and **How AI should handle it** support Markdown or TXT. Selecting a format does not replace creating or saving the skill.
## View, edit, and change status
Search by name or description, then select a skill name or **View** to open its details.
For a custom skill, select **Edit** in the detail view or menu, then **Save changes**. Deselecting every tool and saving removes all tool links.
The list switch saves status separately: **Active** means enabled and **Inactive** means disabled. Built-in skills can be enabled or disabled, but their content cannot be edited or deleted.
## Deletion and save errors
To delete a custom skill, use its menu → **Delete** → confirm. It disappears from the list after success.
If details or tools fail to load, select **Retry loading** before saving. If content is saved but later settings fail, retry on the same page; do not create another skill. When leaving an editor, keep editing or explicitly discard unsaved changes.
This documentation is built and hosted on [Mintlify](https://mintlify.com), a developer documentation platform.
The screenshot uses demonstration data.
**When to use it** and **How AI should handle it** support Markdown or TXT. Selecting a format does not replace creating or saving the skill.
## View, edit, and change status
Search by name or description, then select a skill name or **View** to open its details.
For a custom skill, select **Edit** in the detail view or menu, then **Save changes**. Deselecting every tool and saving removes all tool links.
The list switch saves status separately: **Active** means enabled and **Inactive** means disabled. Built-in skills can be enabled or disabled, but their content cannot be edited or deleted.
## Deletion and save errors
To delete a custom skill, use its menu → **Delete** → confirm. It disappears from the list after success.
If details or tools fail to load, select **Retry loading** before saving. If content is saved but later settings fail, retry on the same page; do not create another skill. When leaving an editor, keep editing or explicitly discard unsaved changes.
This documentation is built and hosted on [Mintlify](https://mintlify.com), a developer documentation platform.